
Level Up Your Cooking: Mastering Knife Etiquette with Bell Peppers


Bell Peppers are a great addition to salads, sautéd dishes, and so many more dishes in the kitchen. I have seen many times how people have struggled to cut them without the seeds getting all over the place and making a mess. The peppers are a unique shape and for a beginner in the kitchen can be a bit overwhelming to figure out. I am here to show you how you can cut bell peppers easy and with little to no mess.
What do you need?
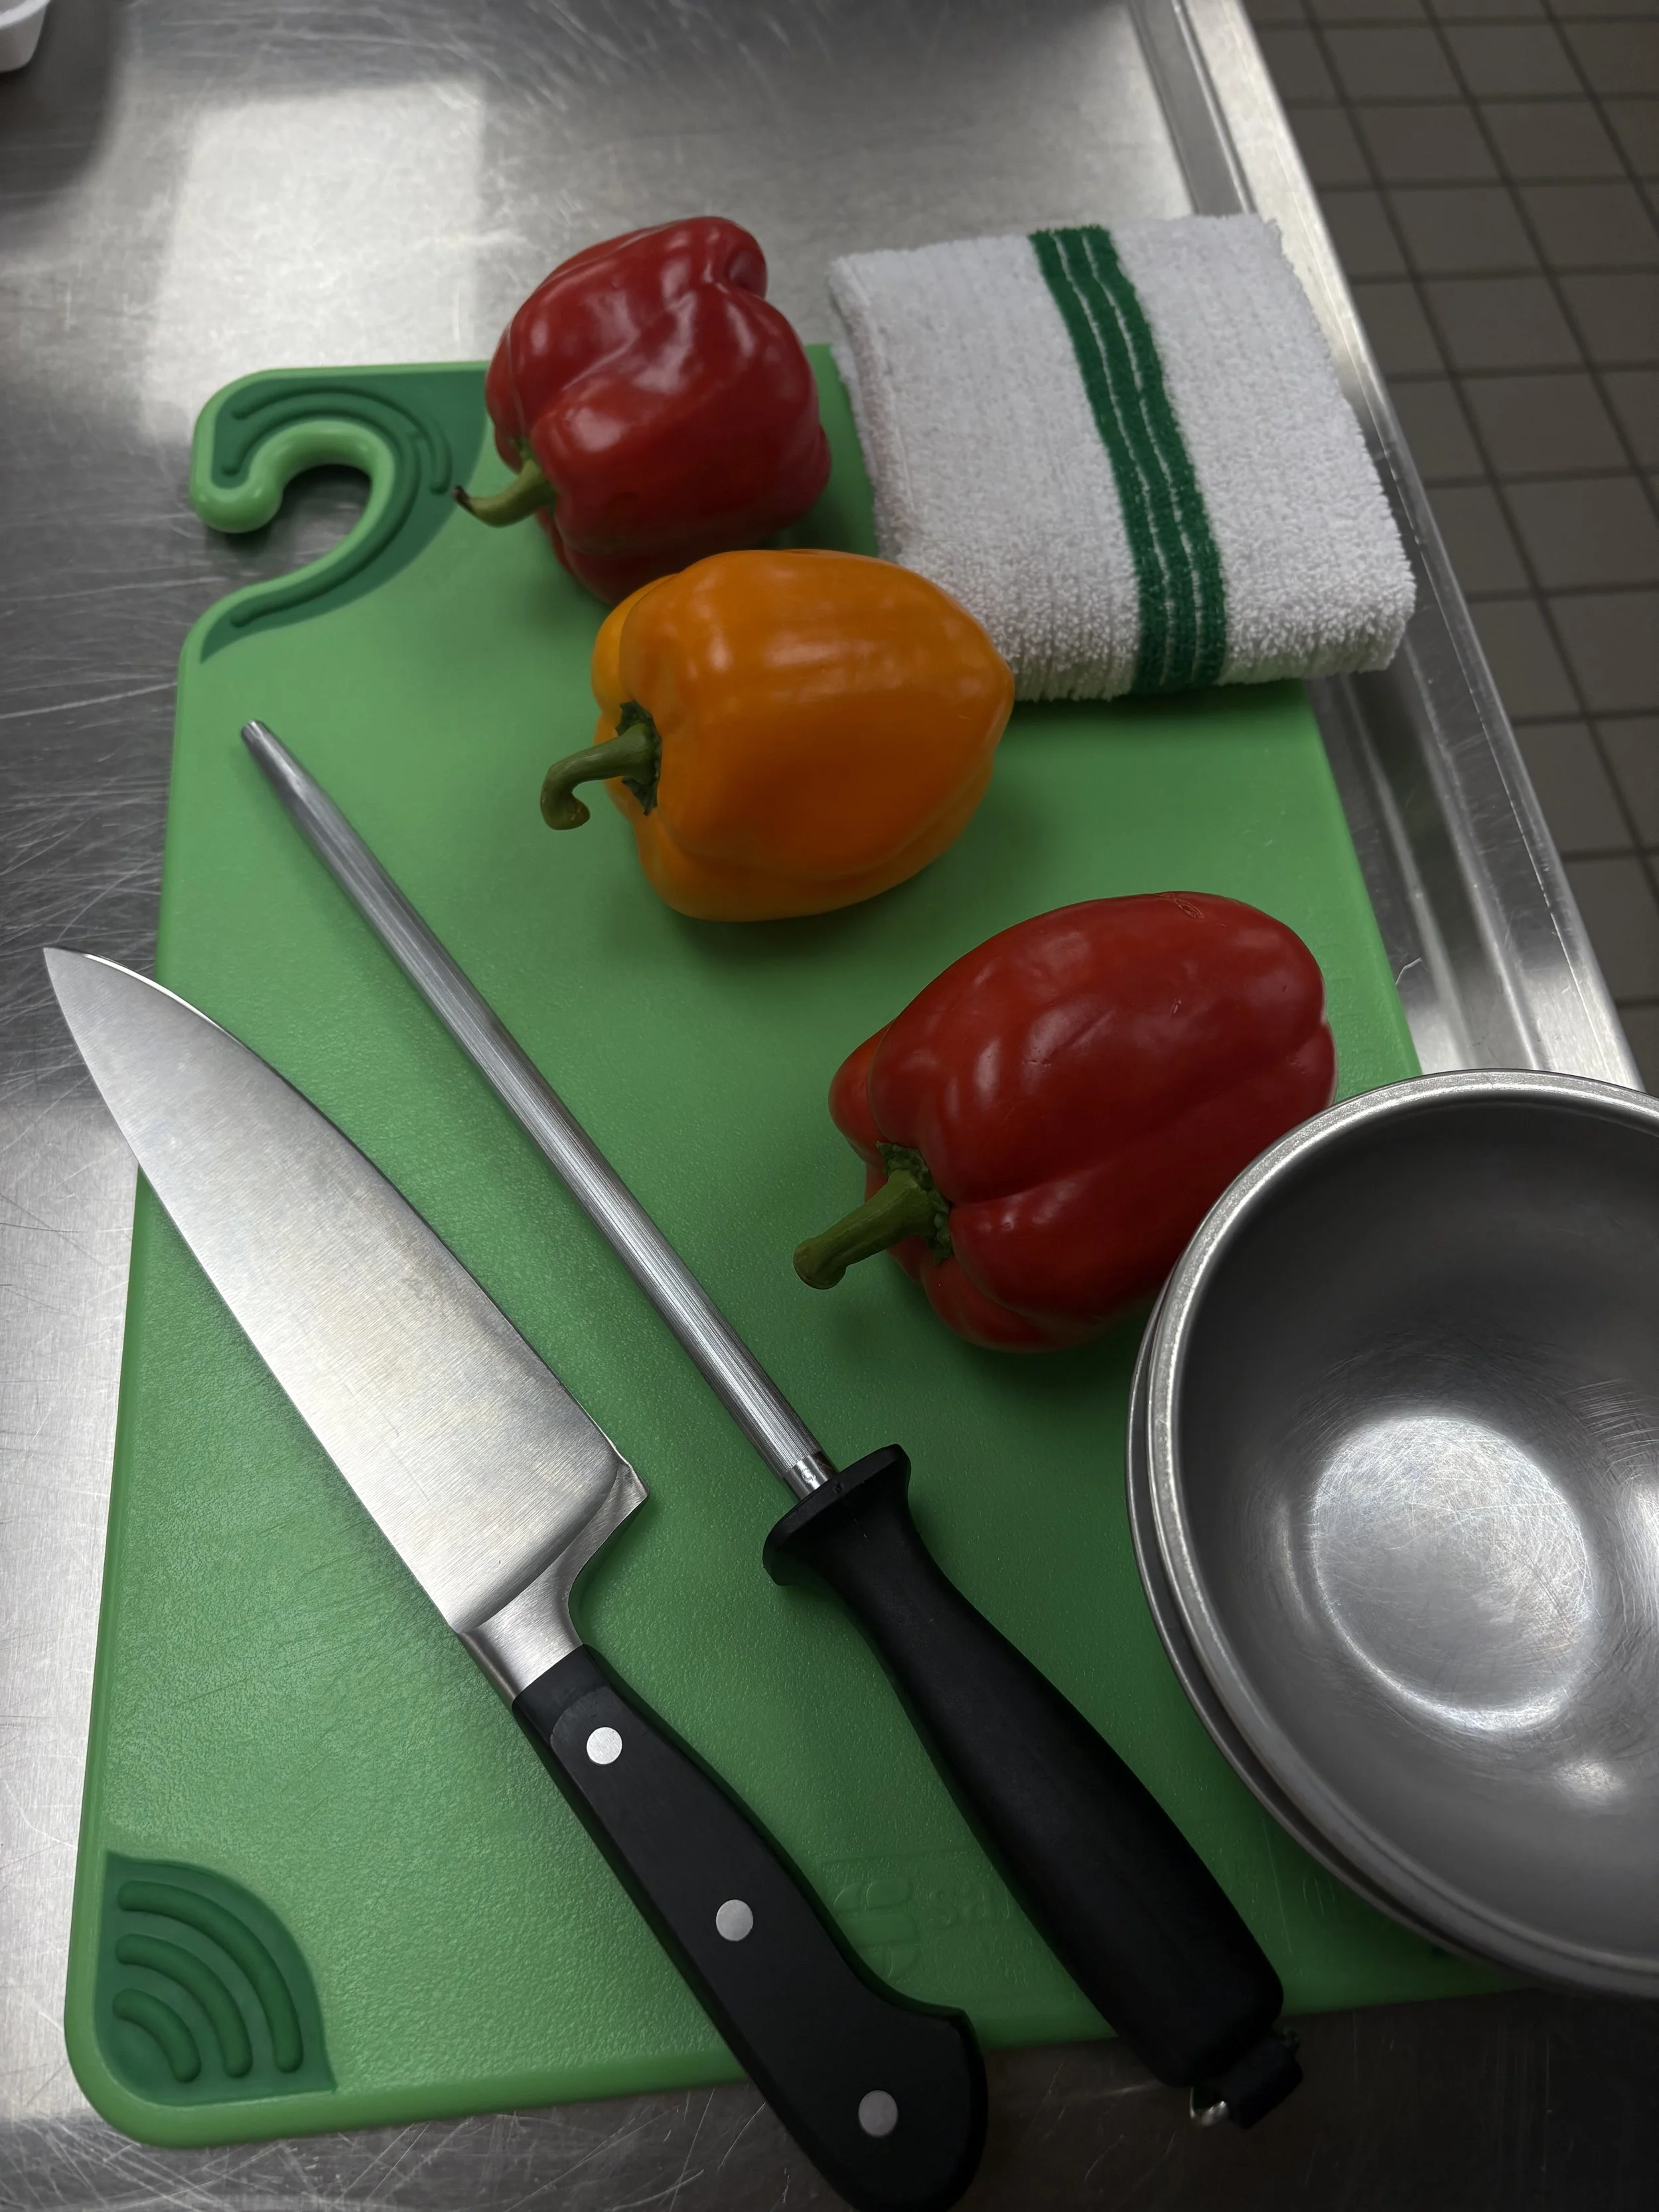
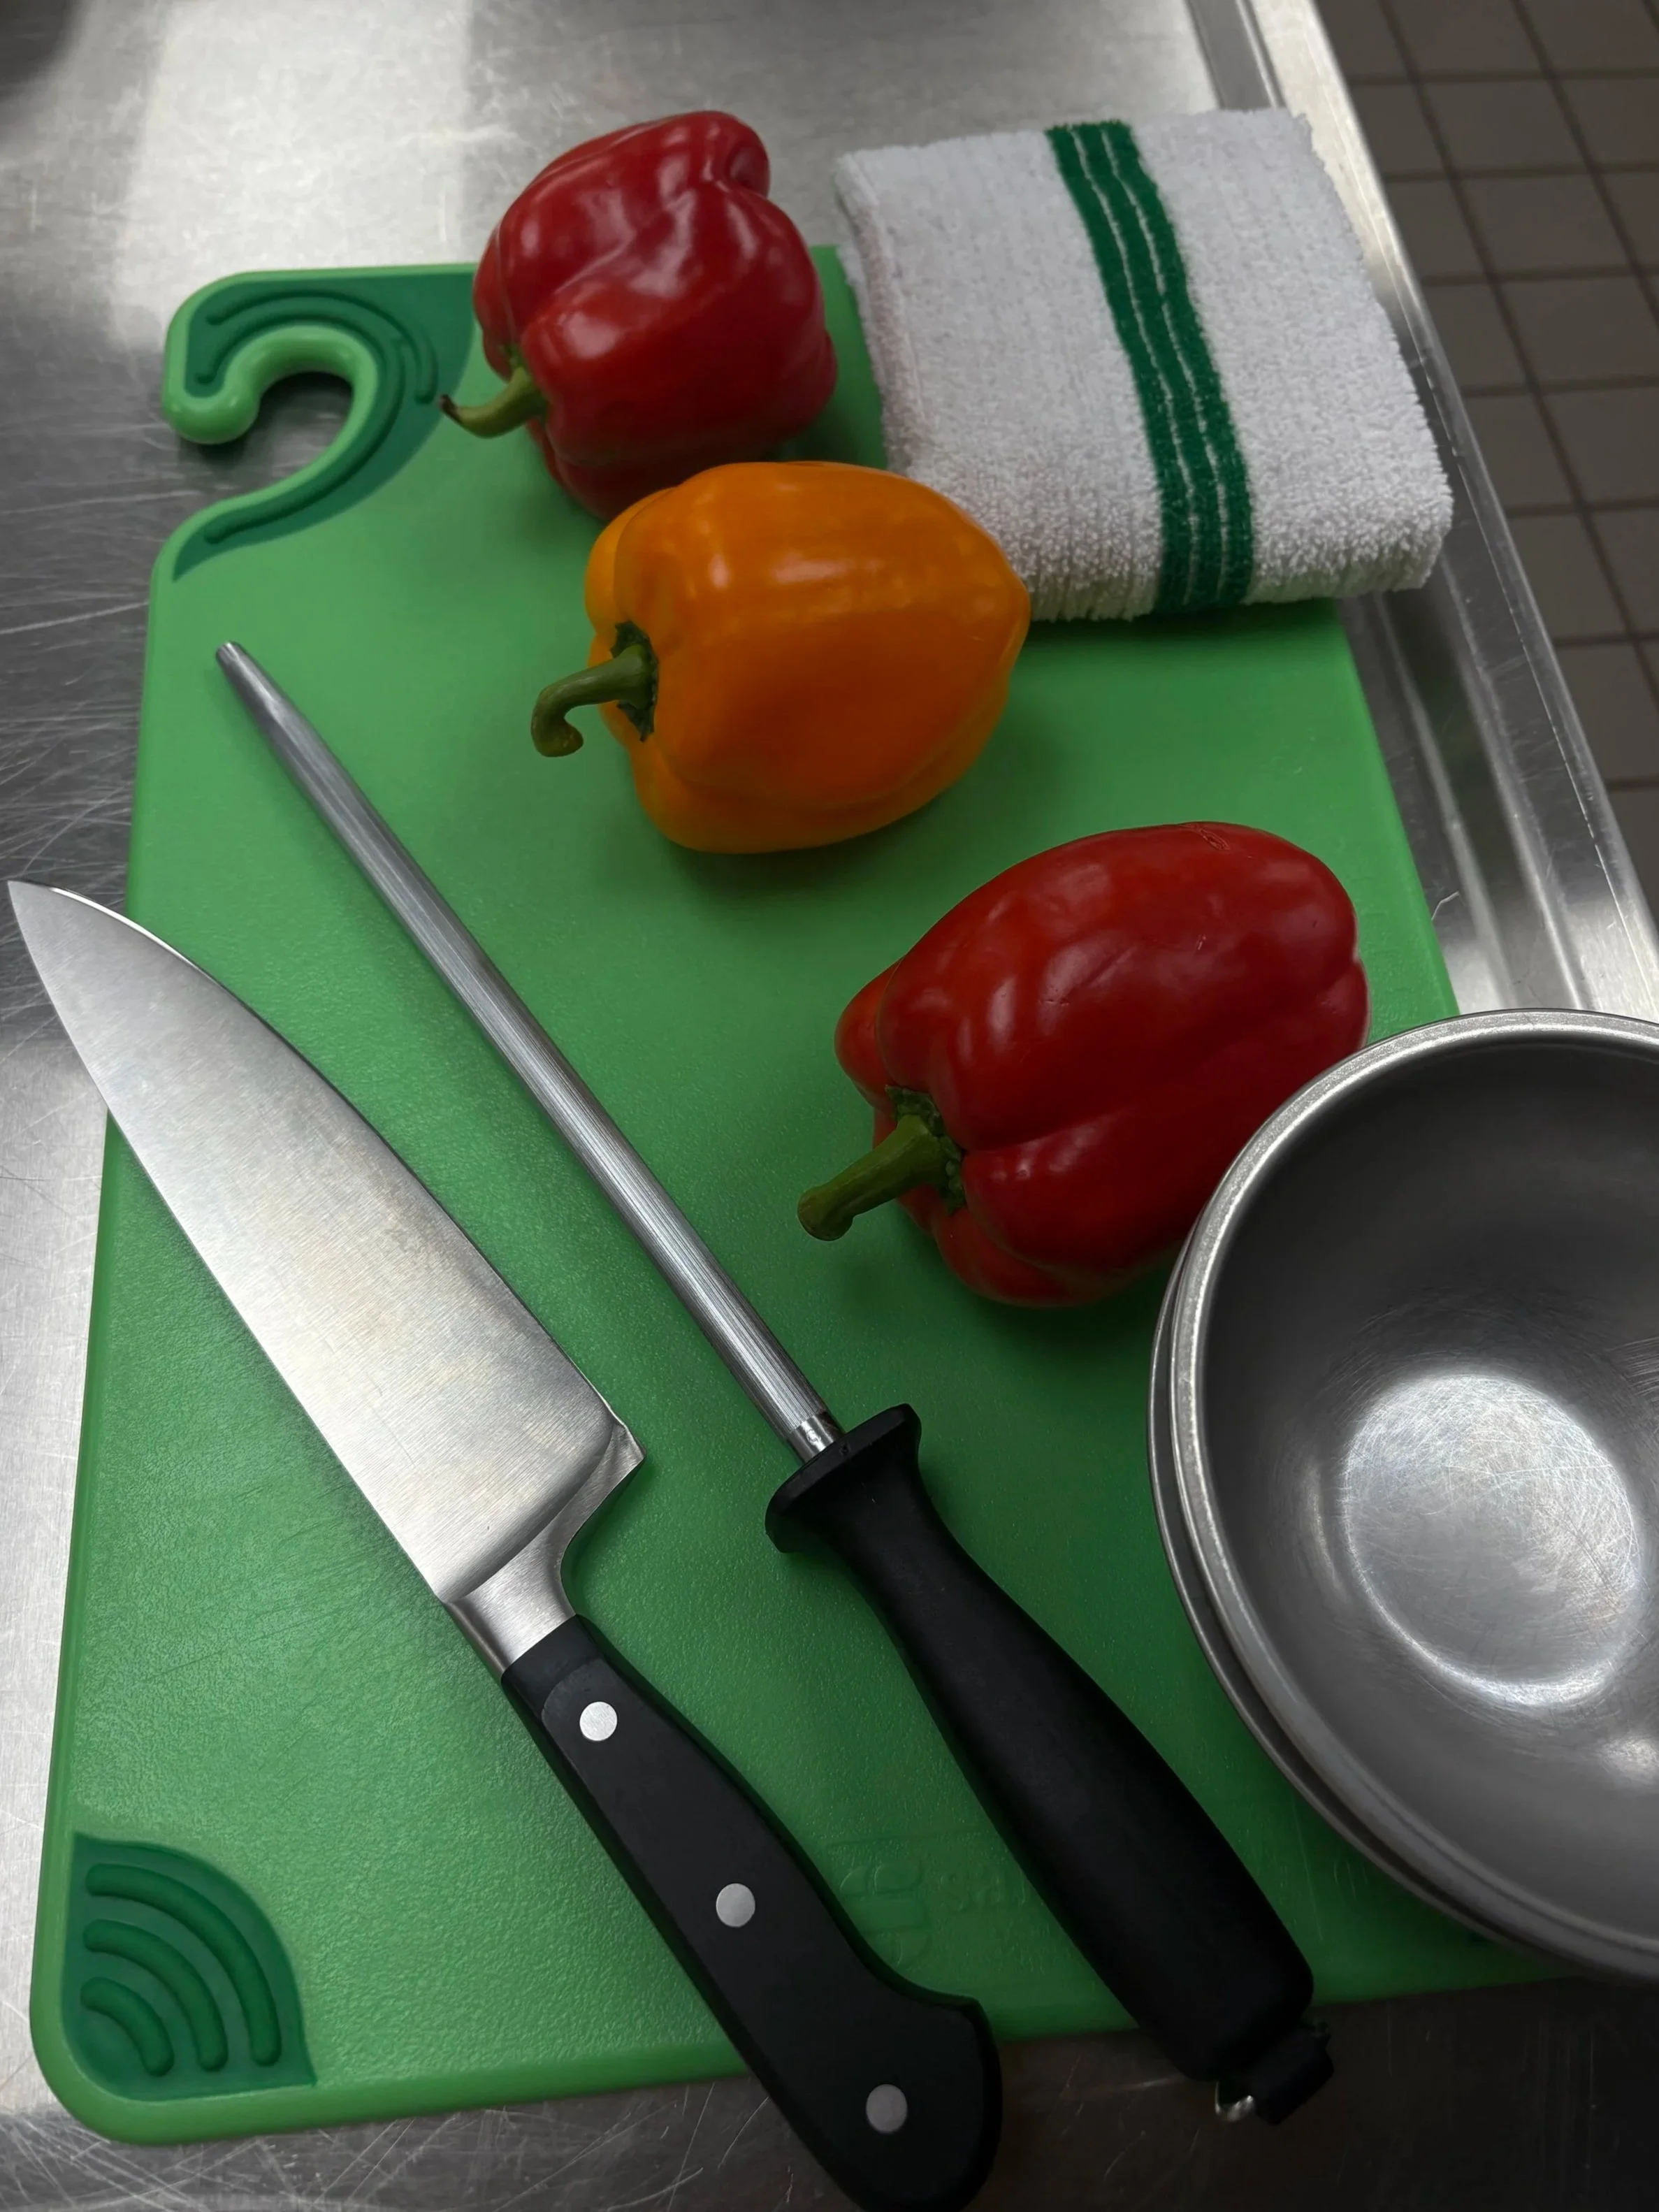
To start you will want Fresh bell peppers and a Sharp chef’s knife or santoku knife and if you have a regular kitchen knife it will work as well just not as efficiently.I would recommend a wooden or plastic cutting board. You will want a scrap bowl, and container to store your peppers in.
Not necessary, but helpful additional items:
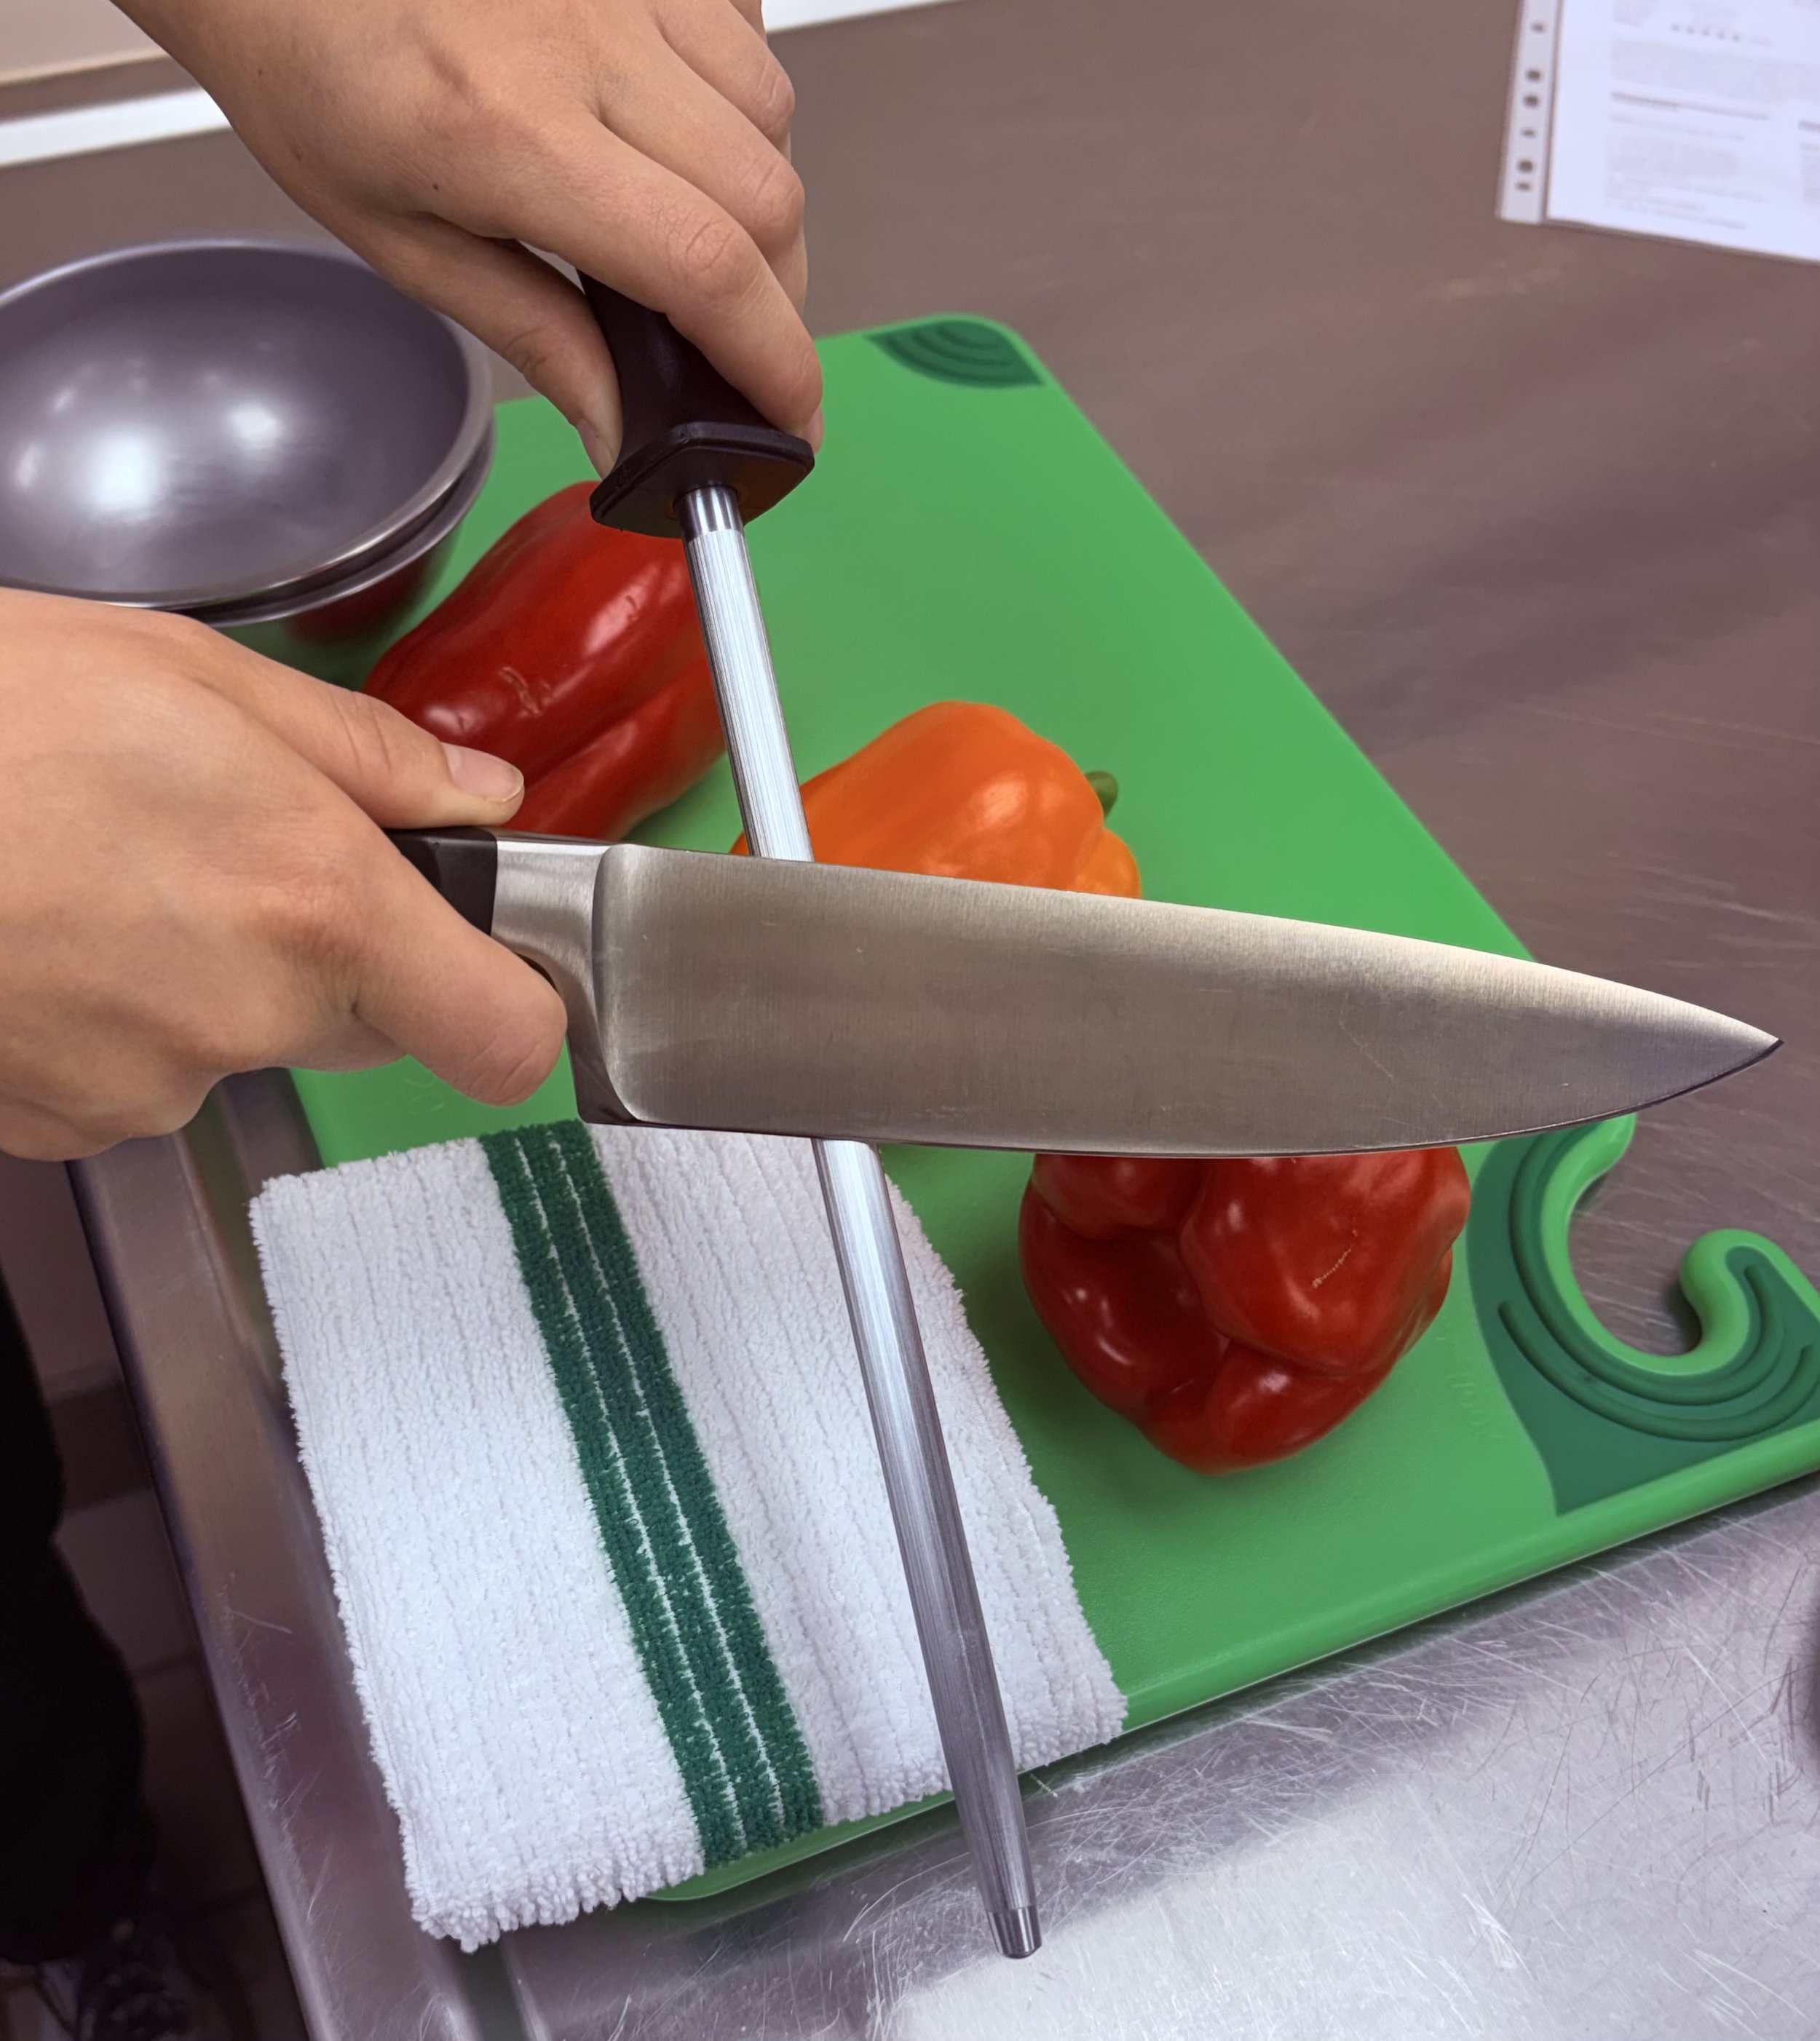
If your cutting board does not stay stuck to the counter a helpful trick is to put a clean wet dish towel under it. Before you begin to cut with your knife it is always a good habit to use a hone on your knife to clean the blade to help it cut smoother through your ingredients.
🧠 Skill Level: Beginner
⏱ Time Required: 5-10 minutes (practice to improve the more time the better)
Good knife technique makes your prep faster and safer.
Here are the basics:
Hold your knife firmly and do not place your fingers on the blade. Make sure your other non cutting hand is out of the way of the knife, if it is securing the veggies make sure your fingers are claw gripping to make it nearly impossible to cut them. Always use a hone on your knife before starting and hold your knife at a 40 degree angle while using the hone. Do not use a dule knife if at all possible, invest in a good knife sharpener.
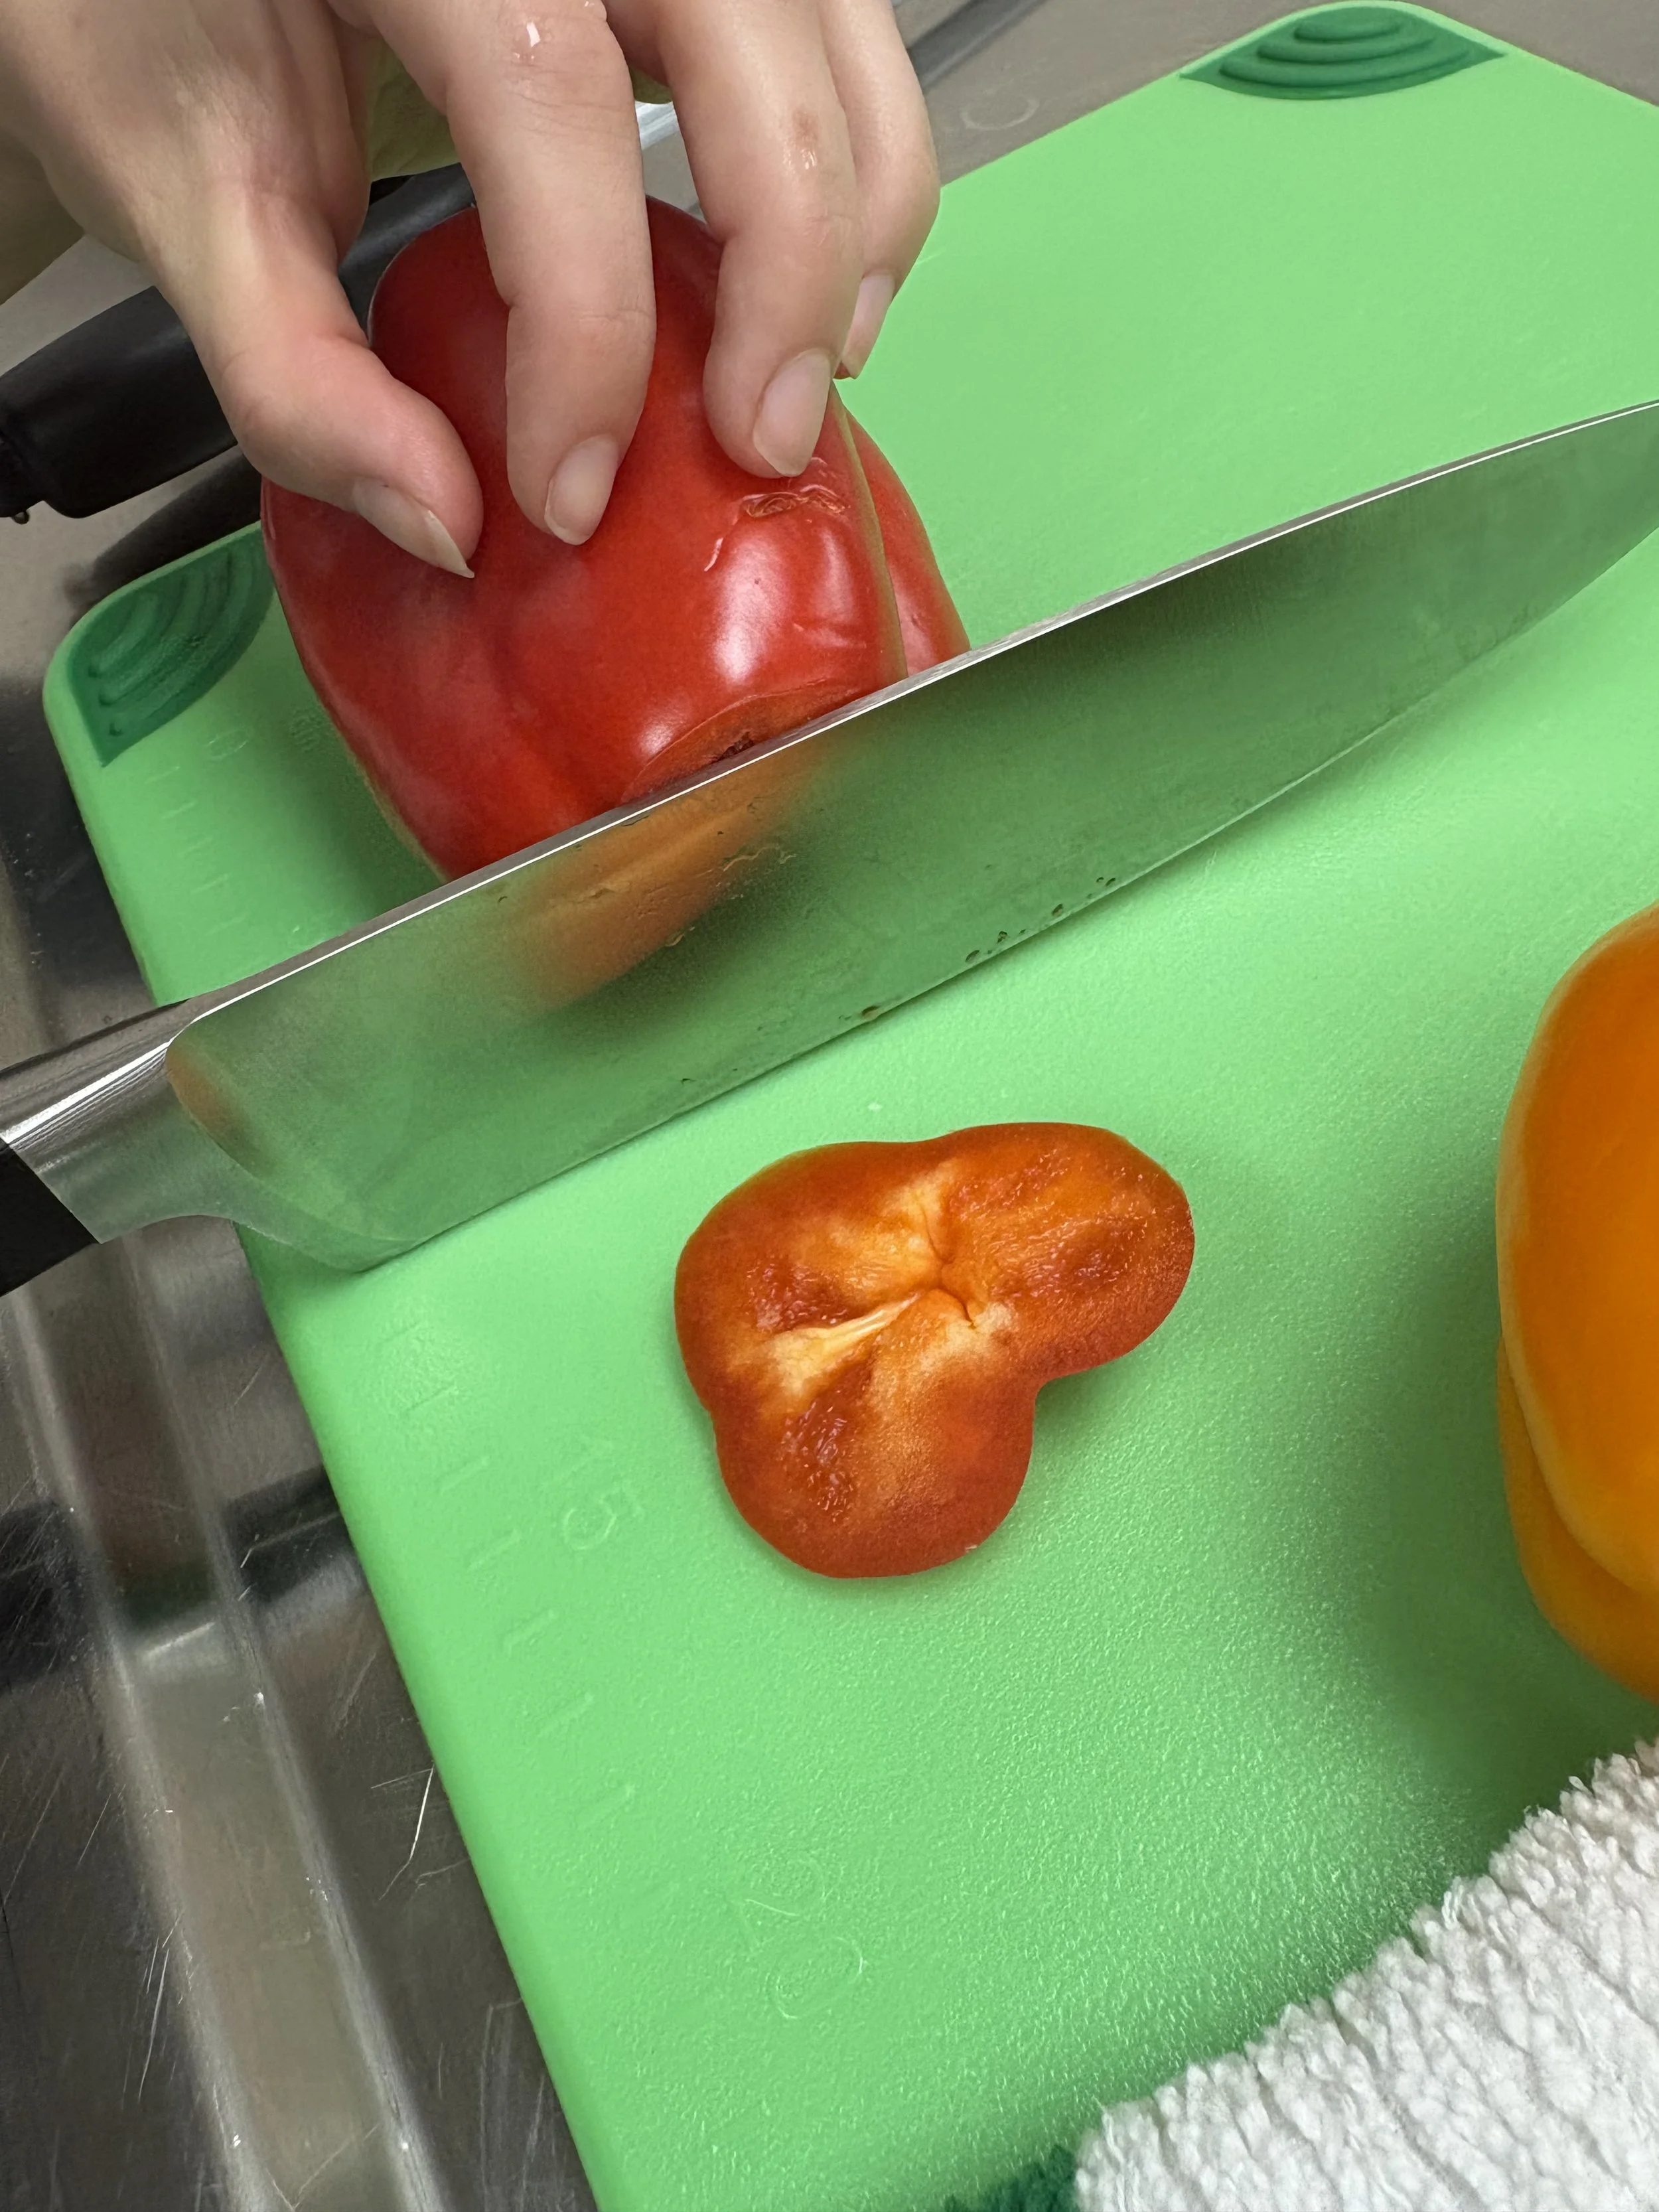
Slicing the bottom off of the bell pepper to create a flat surface.
Step-by-Step: How to Chop Bell Peppers Correctly
Step 1: Choose and Wash Your Peppers
When you are looking to purchase your peppers make sure they are not soft and do not have any discolored brown spots on them.
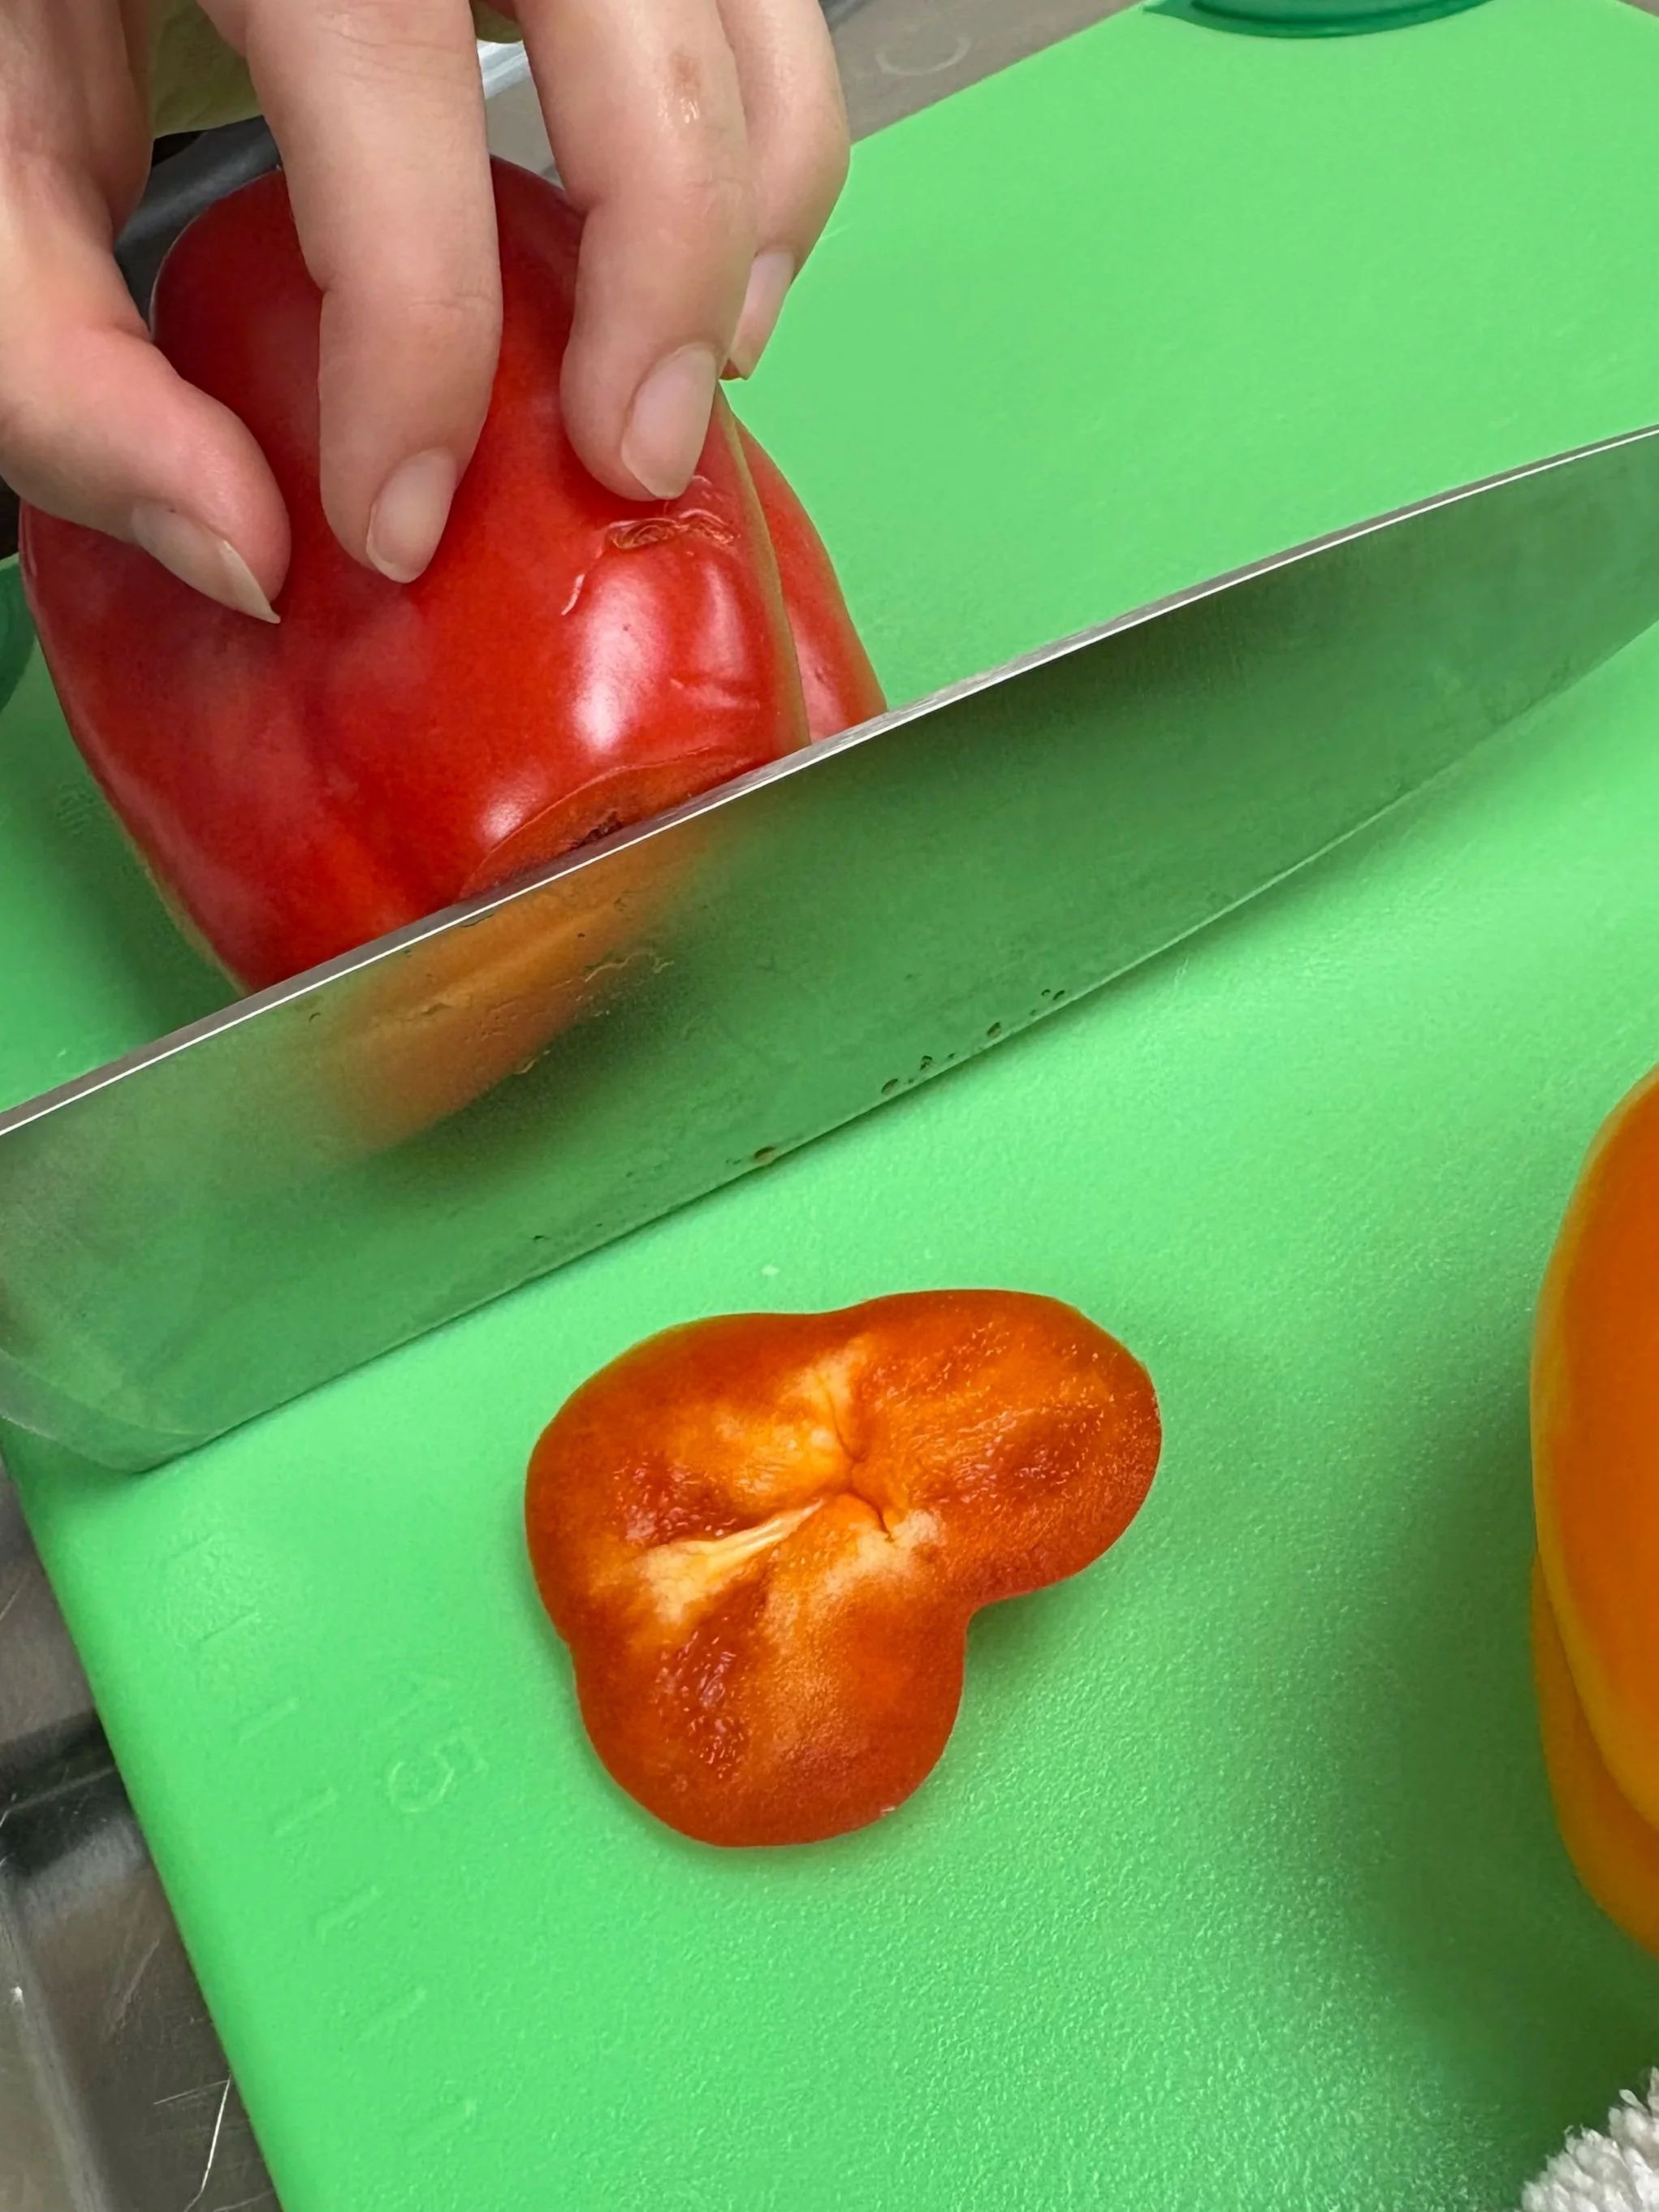
Step 2: Slice Off the Bottom
Lay the pepper on its side and cut about ½ inch from the bottom of the pepper. This will help create a flat surface for the pepper to sit on while you cut it.

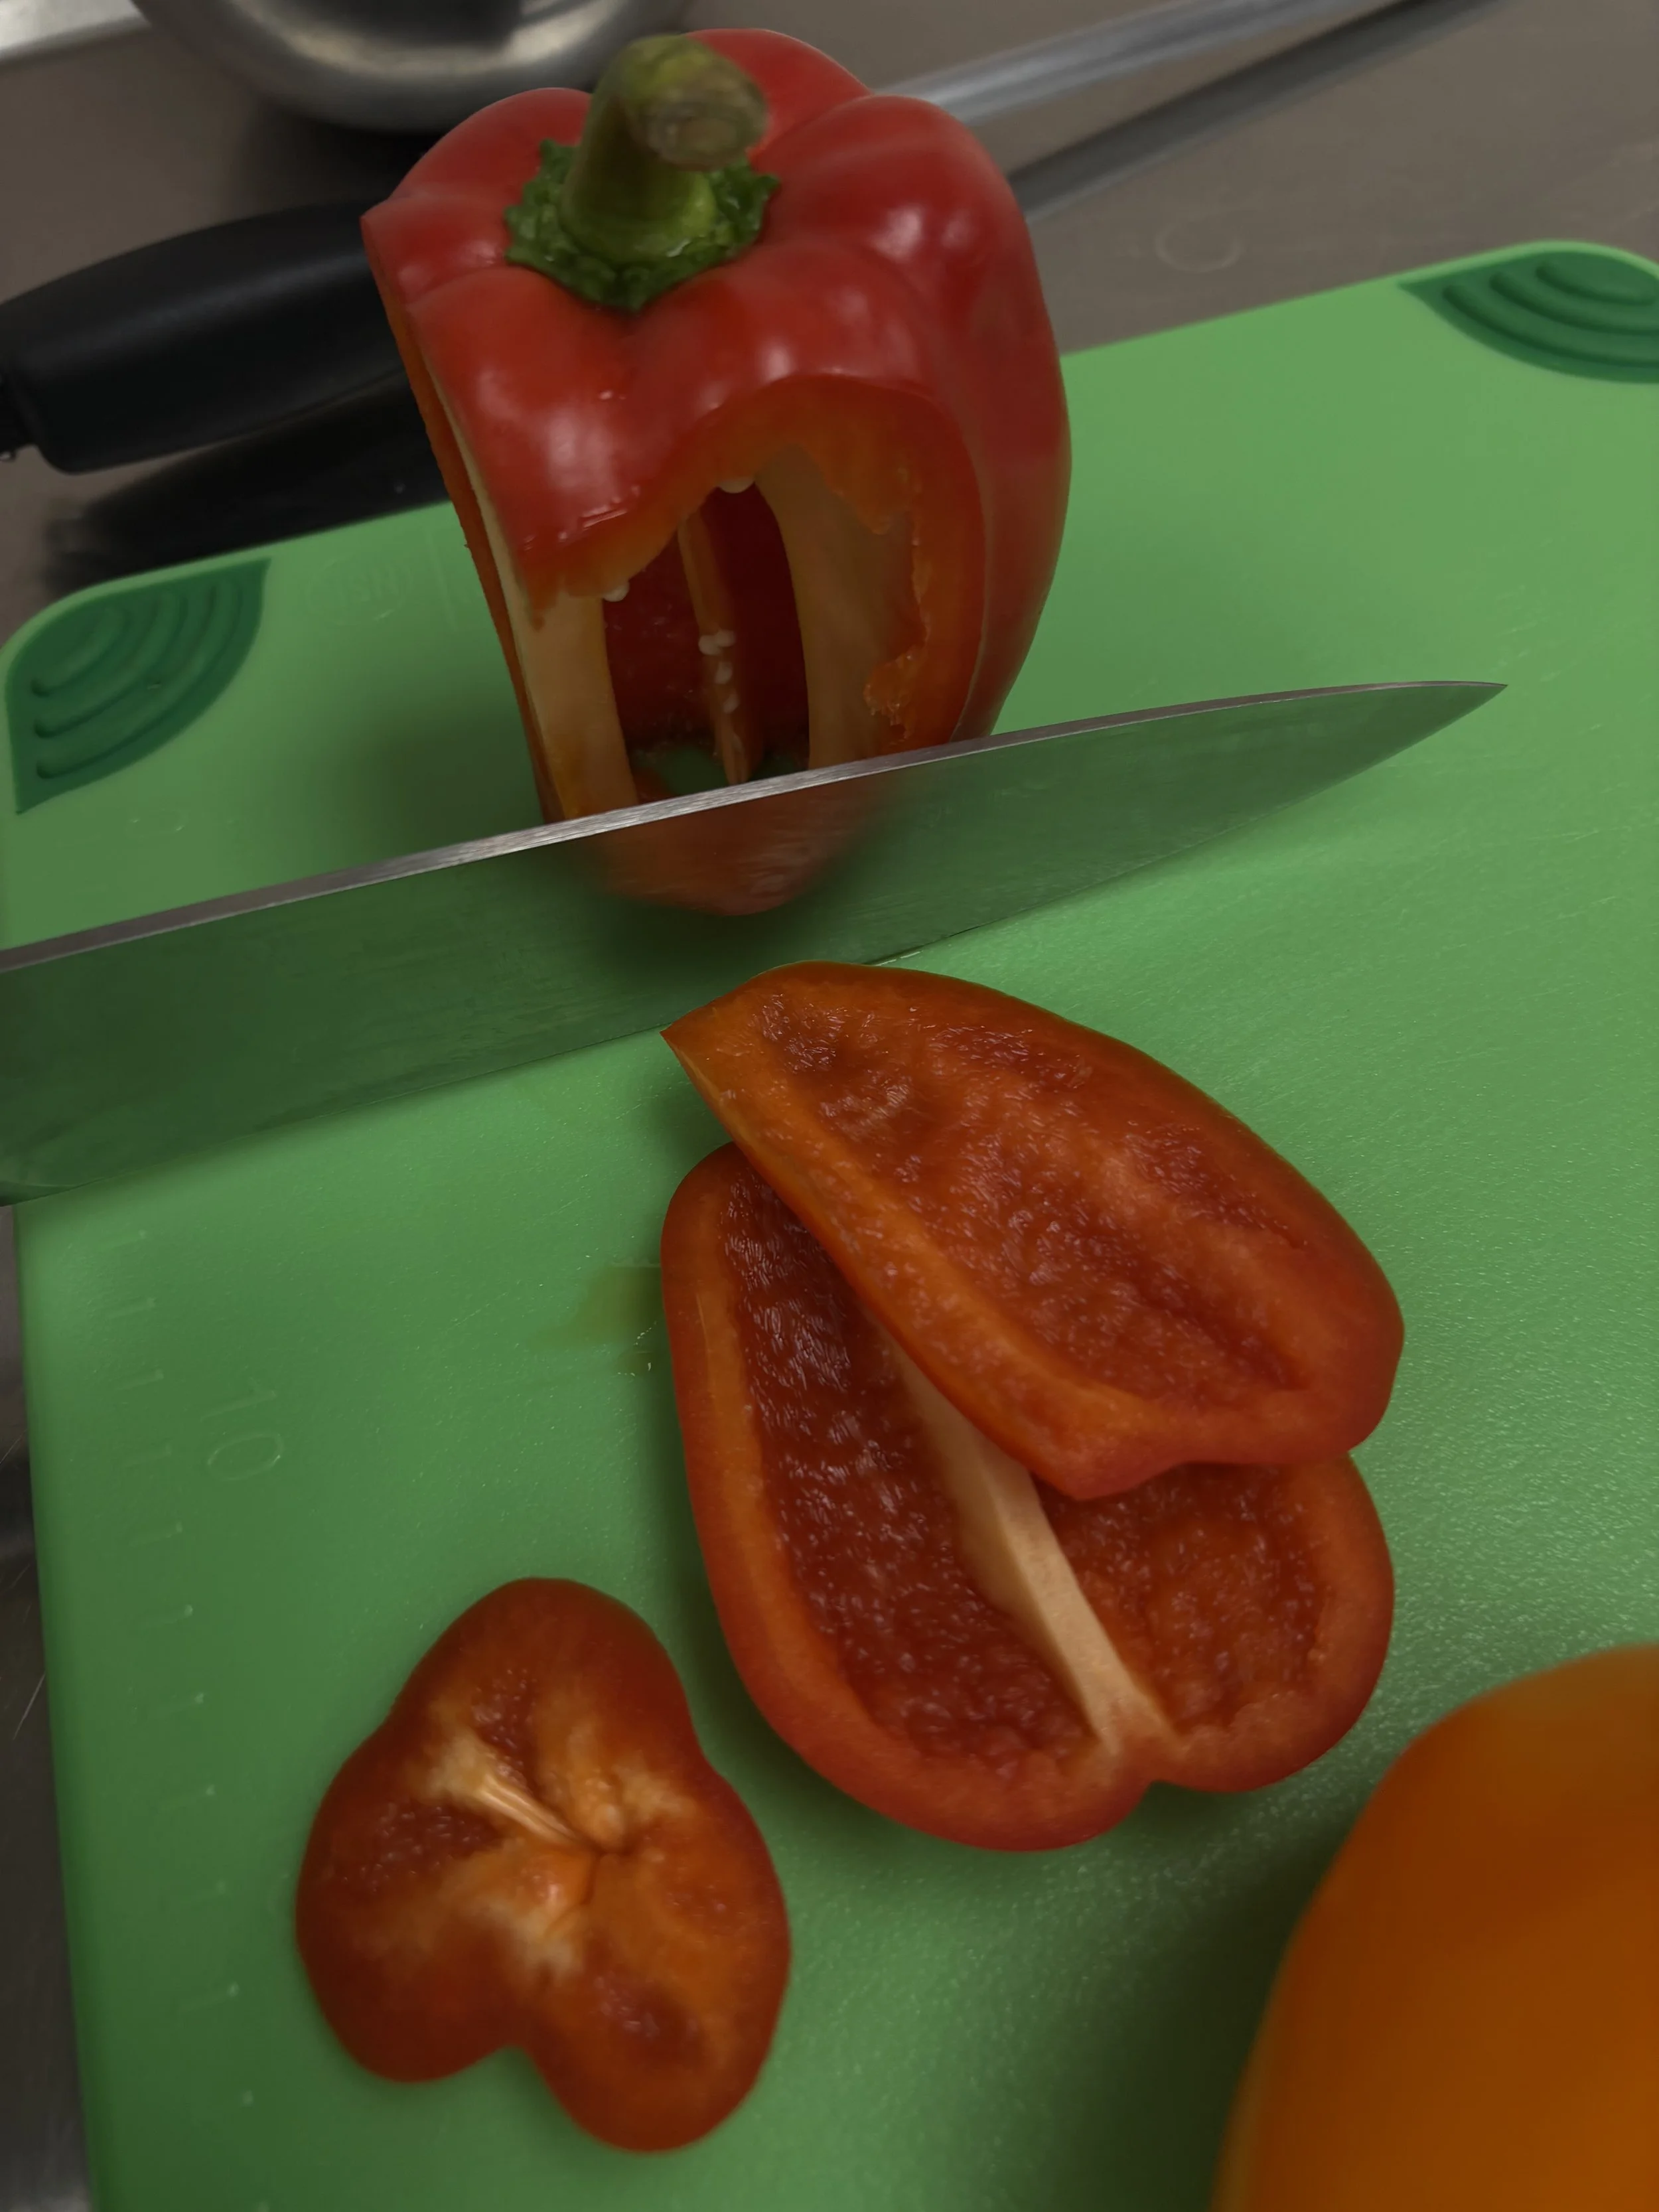
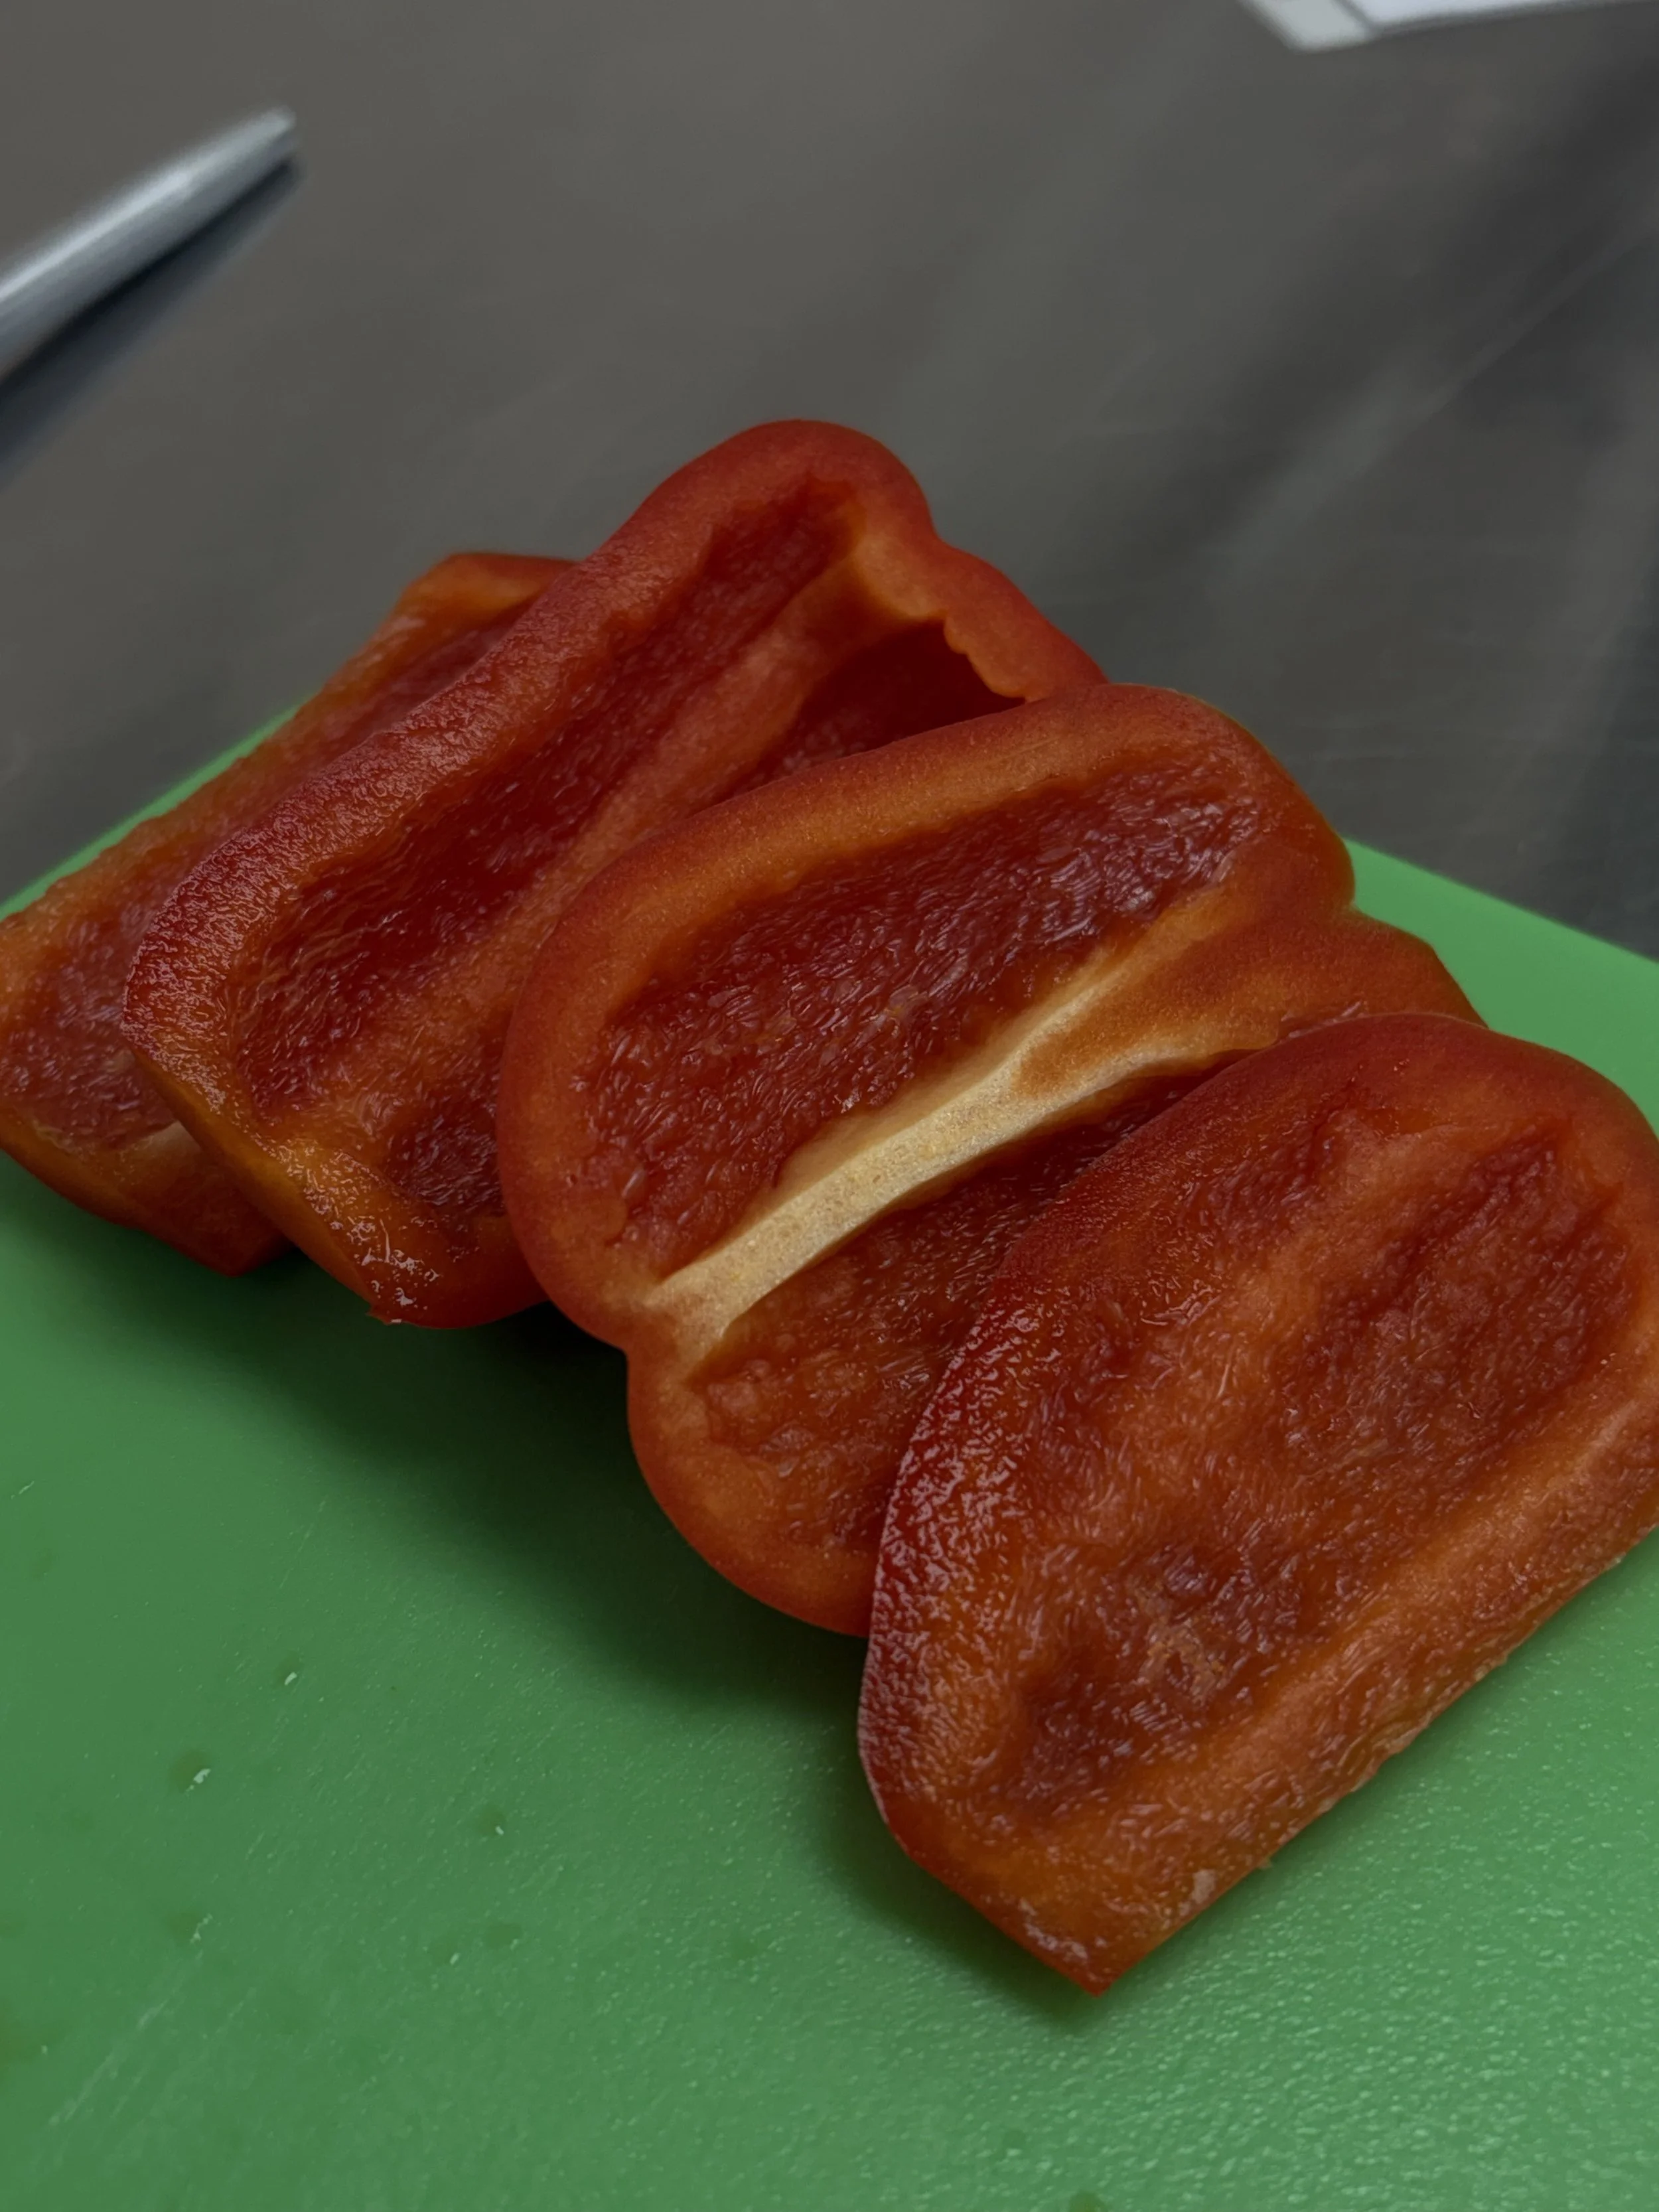
Step 3: Slice the sides off of the pepper
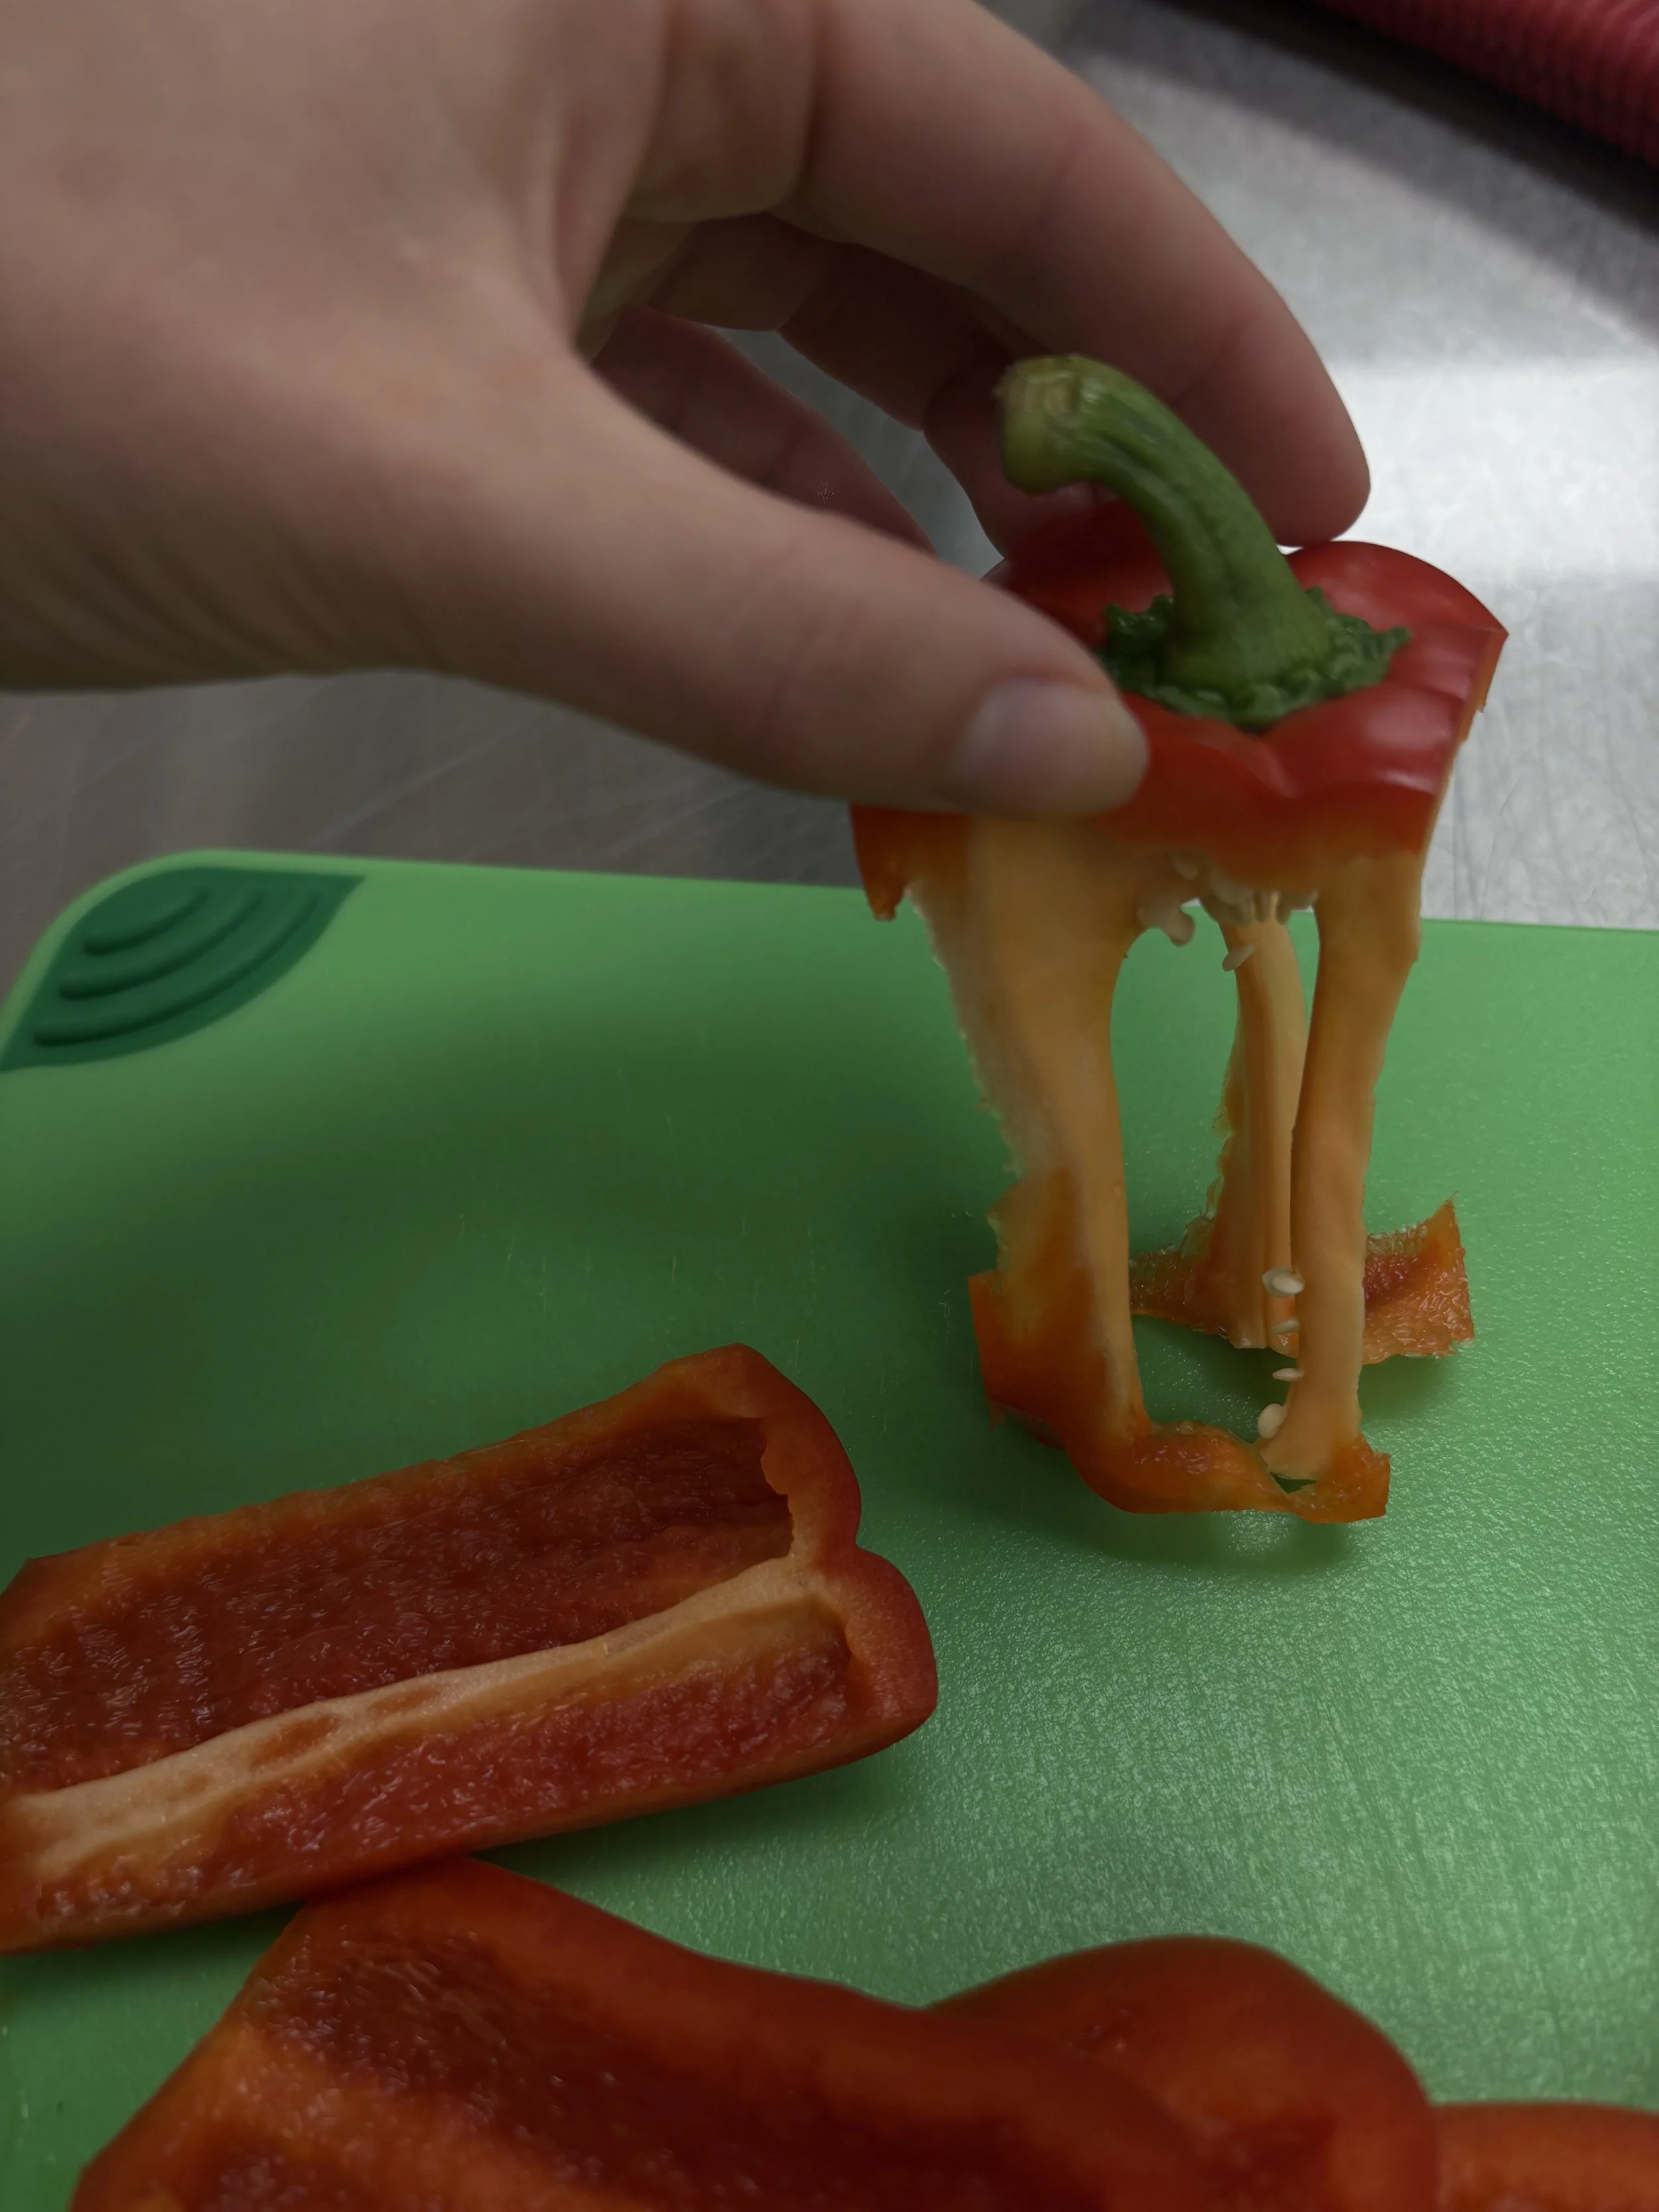
Stand the pepper up on the base you just created and hold the top with your non cutting hand pushing it down on the cutting board. Use the knife to cut straight down on all four sides. The remainder of the pepper can be tossed or used in a broth without the seeds (the seeds are bitter).
Step 4: Flatten and Slice
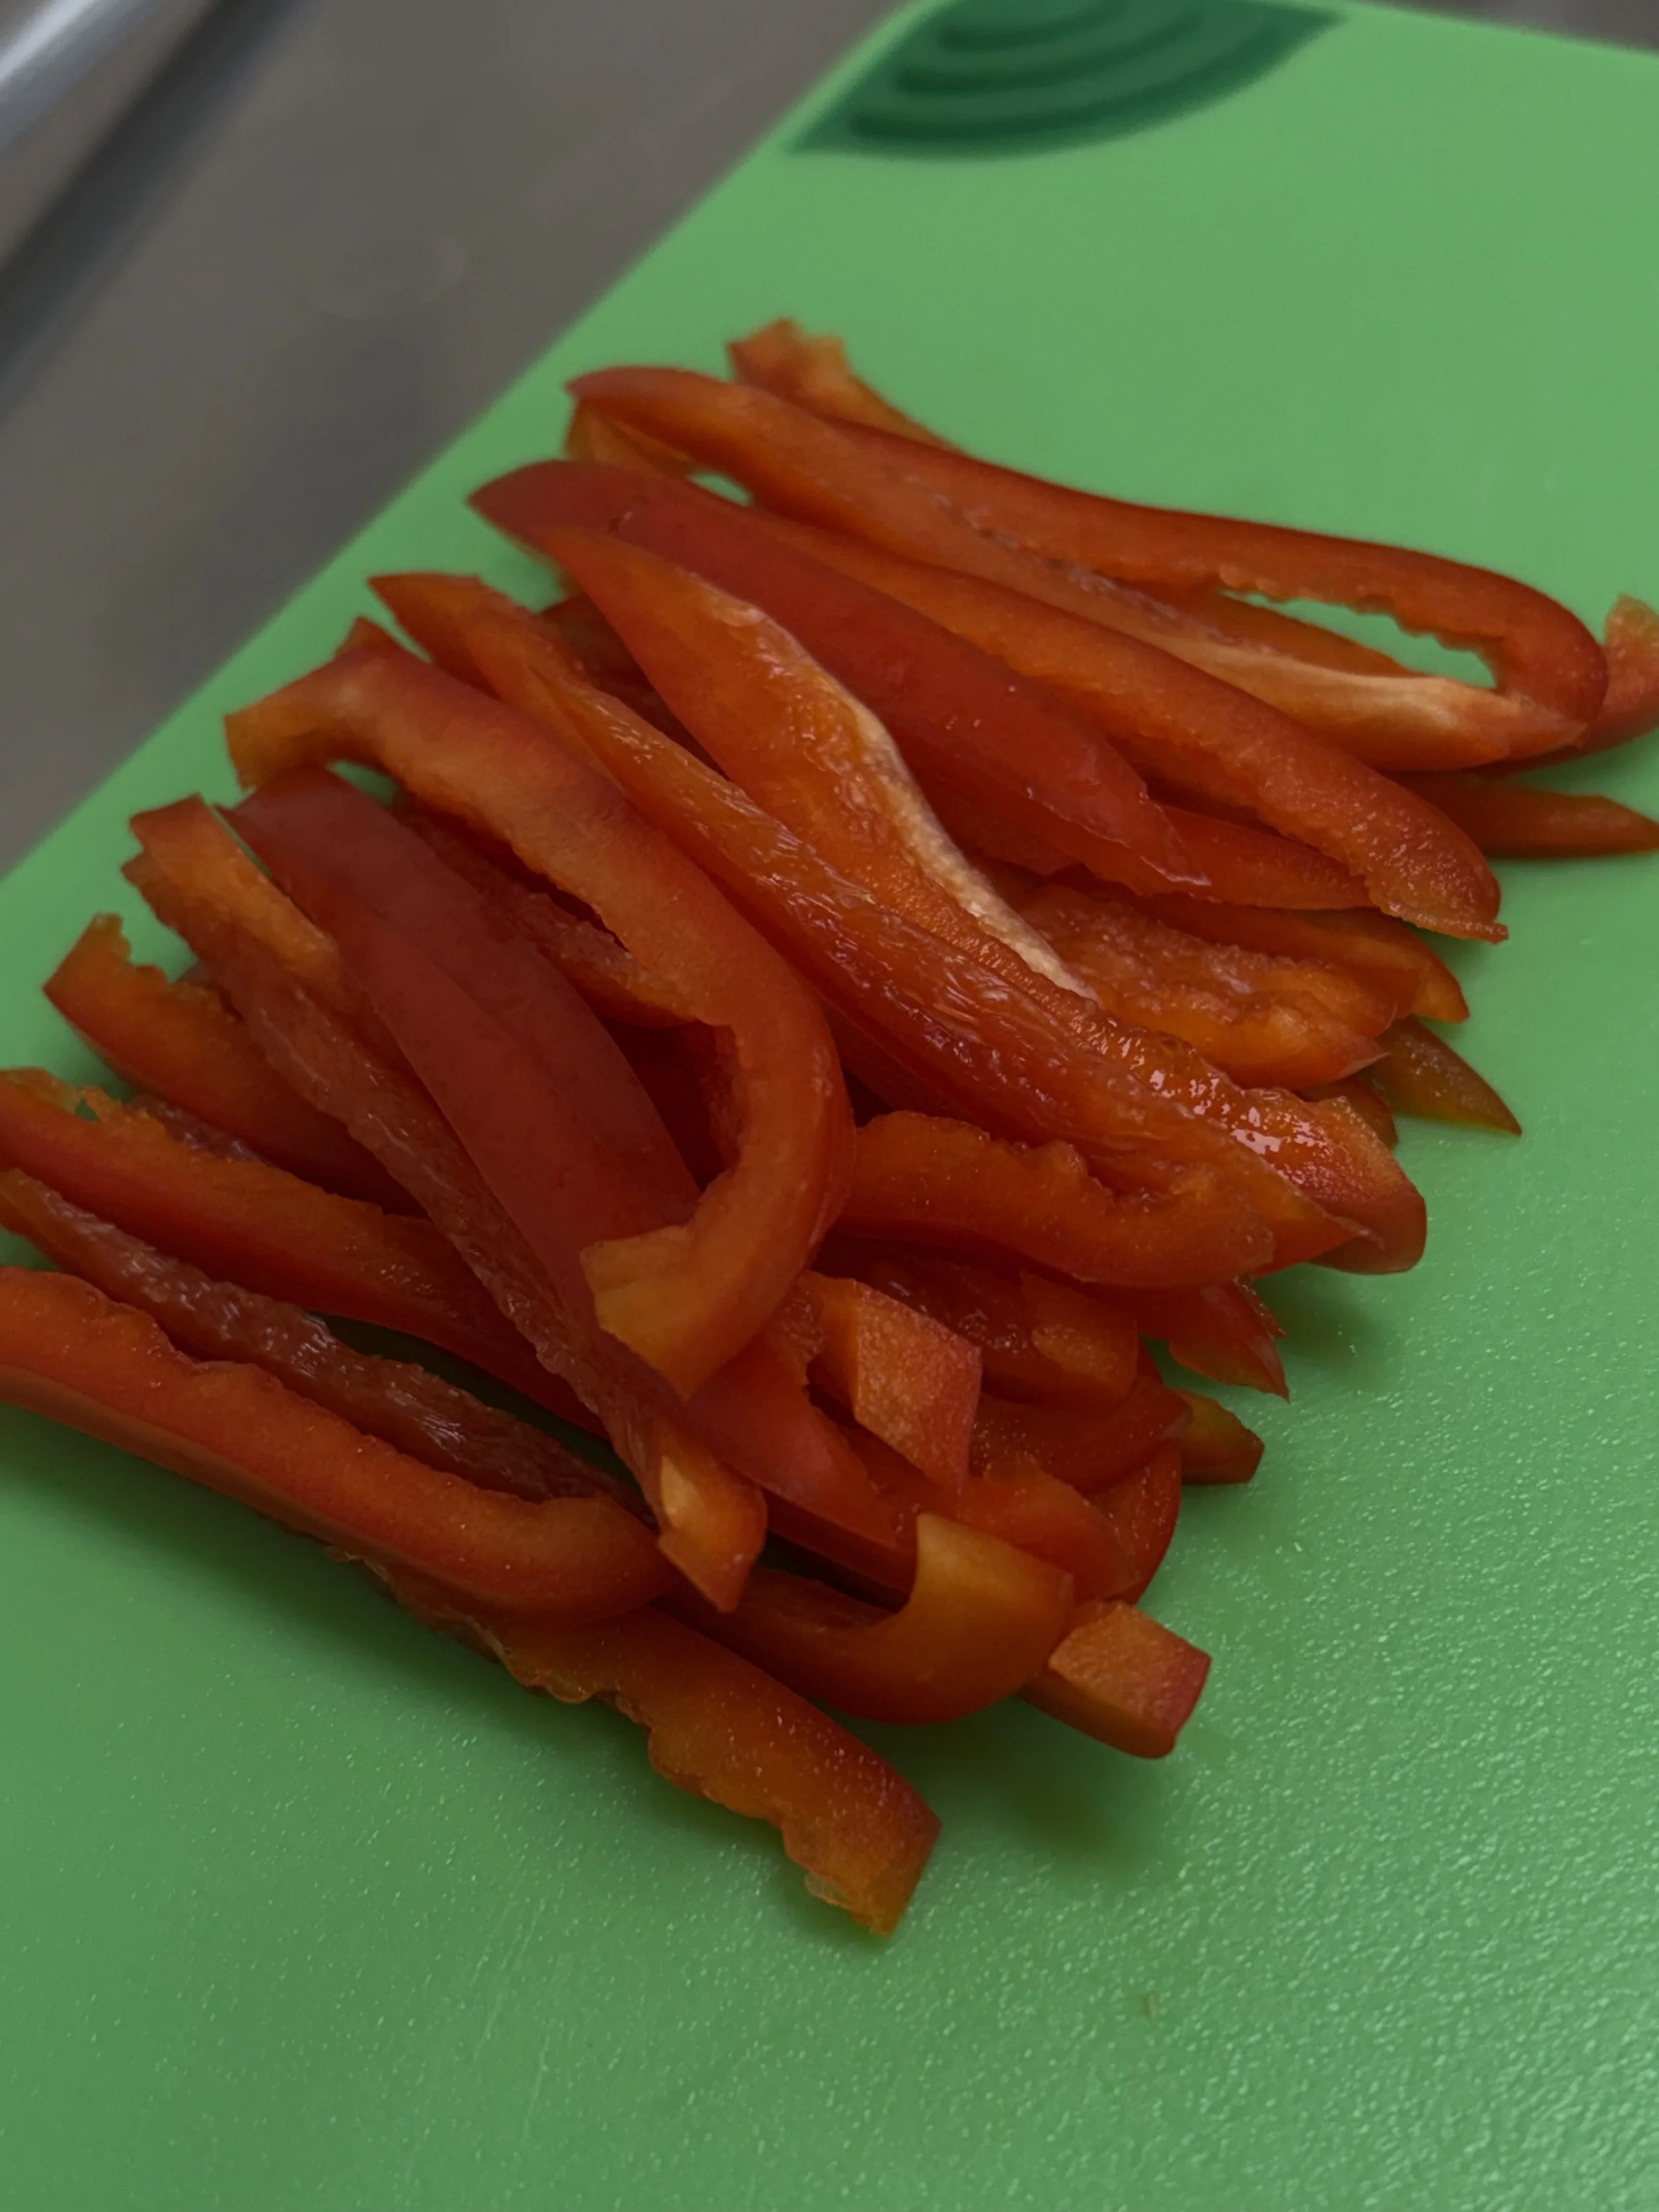
Lay the pepper slices skin side down as this makes it much easier to cut through. Now we are going to slice them long way into strips this process is called julienne. When you julienne your peppers or onions they are all in uniform strips.
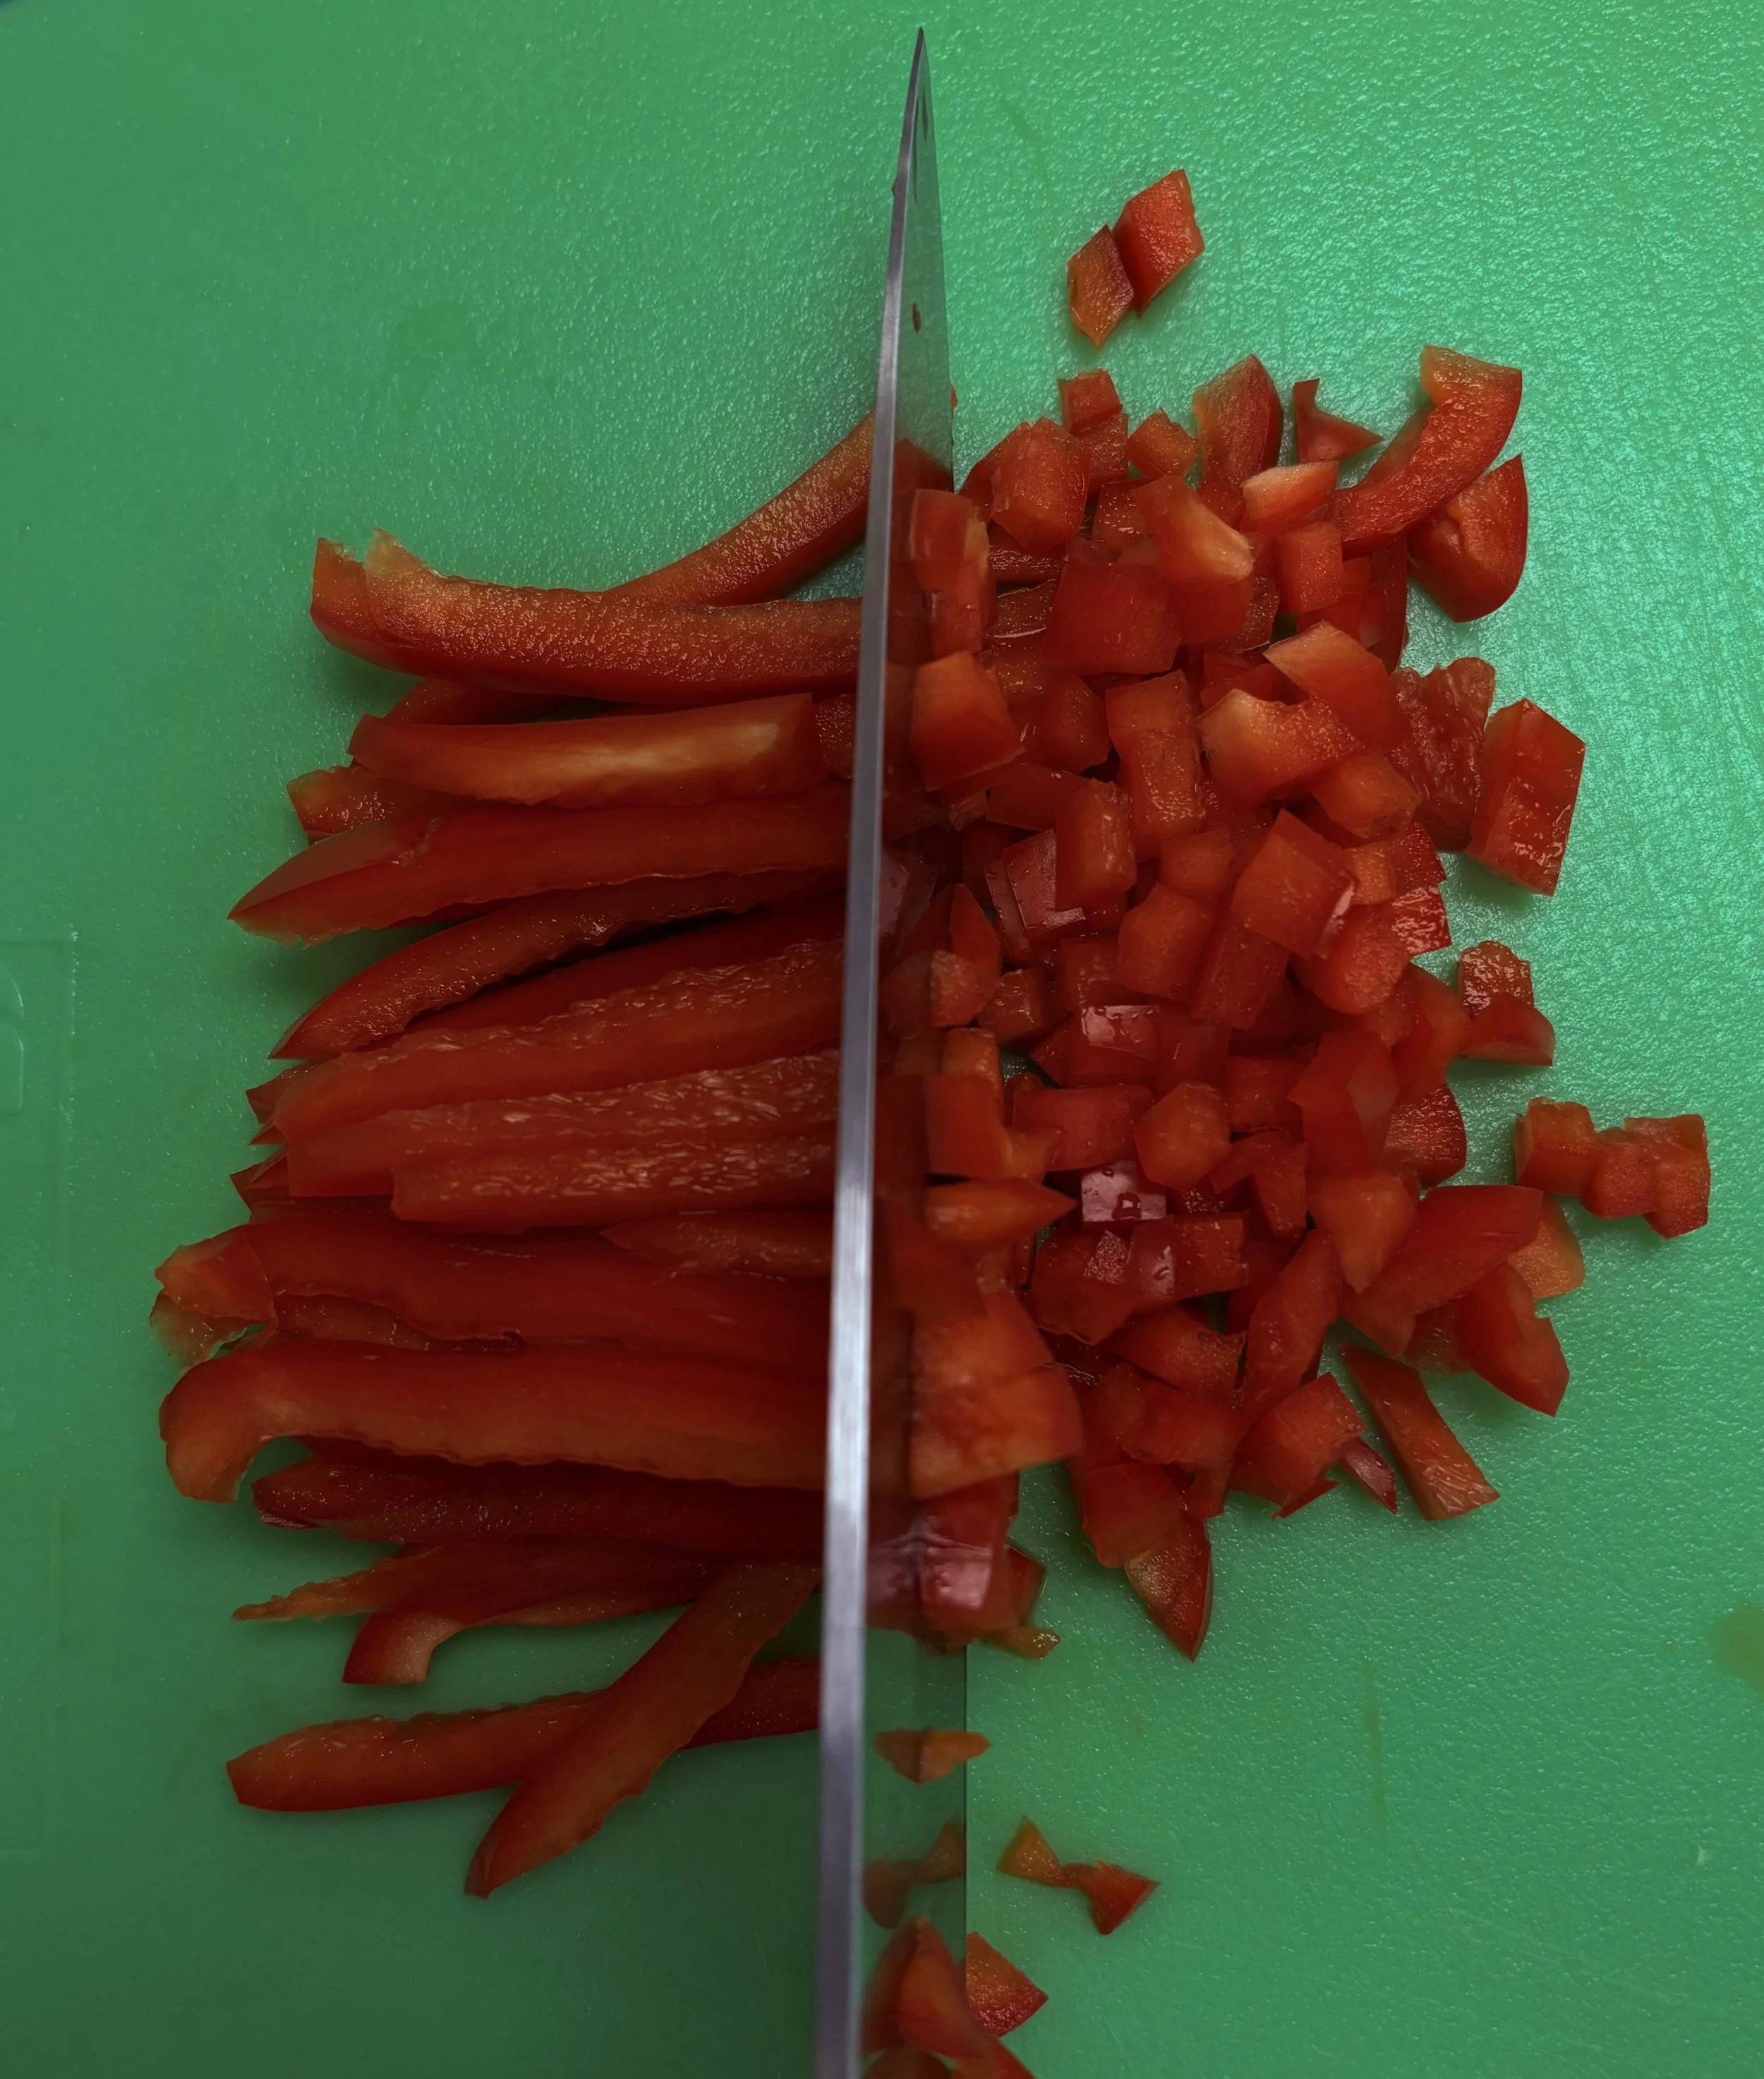
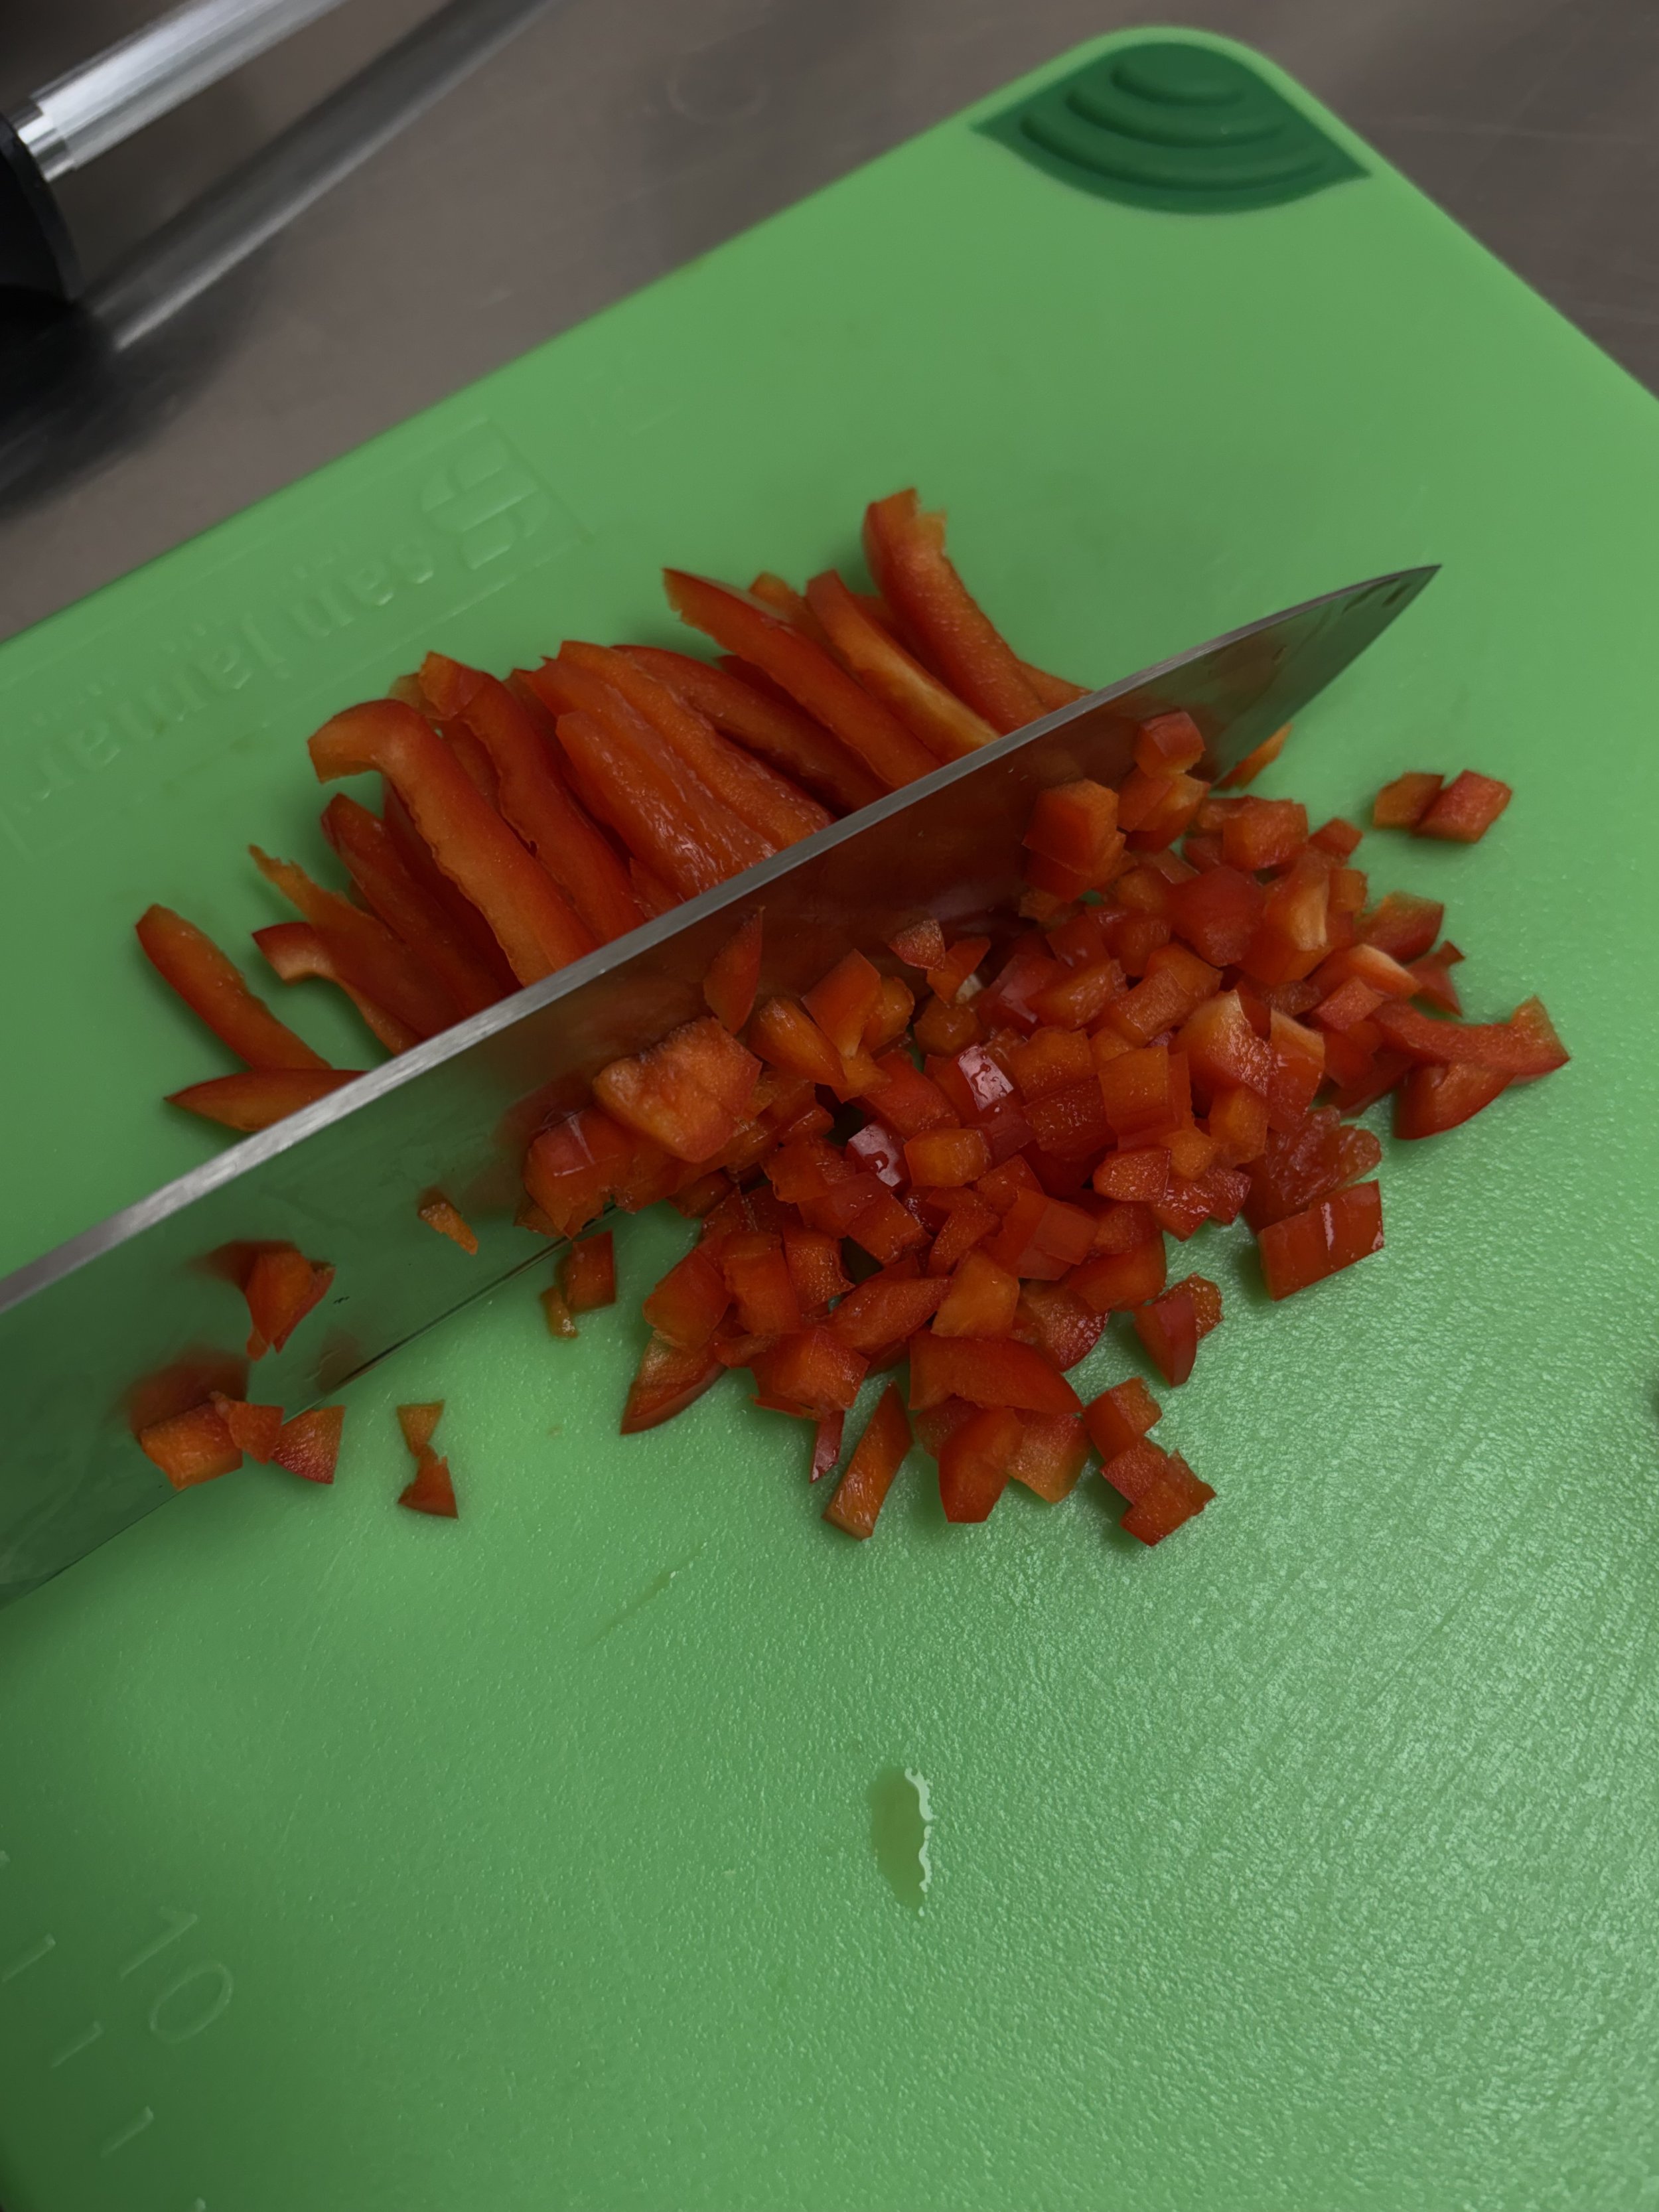
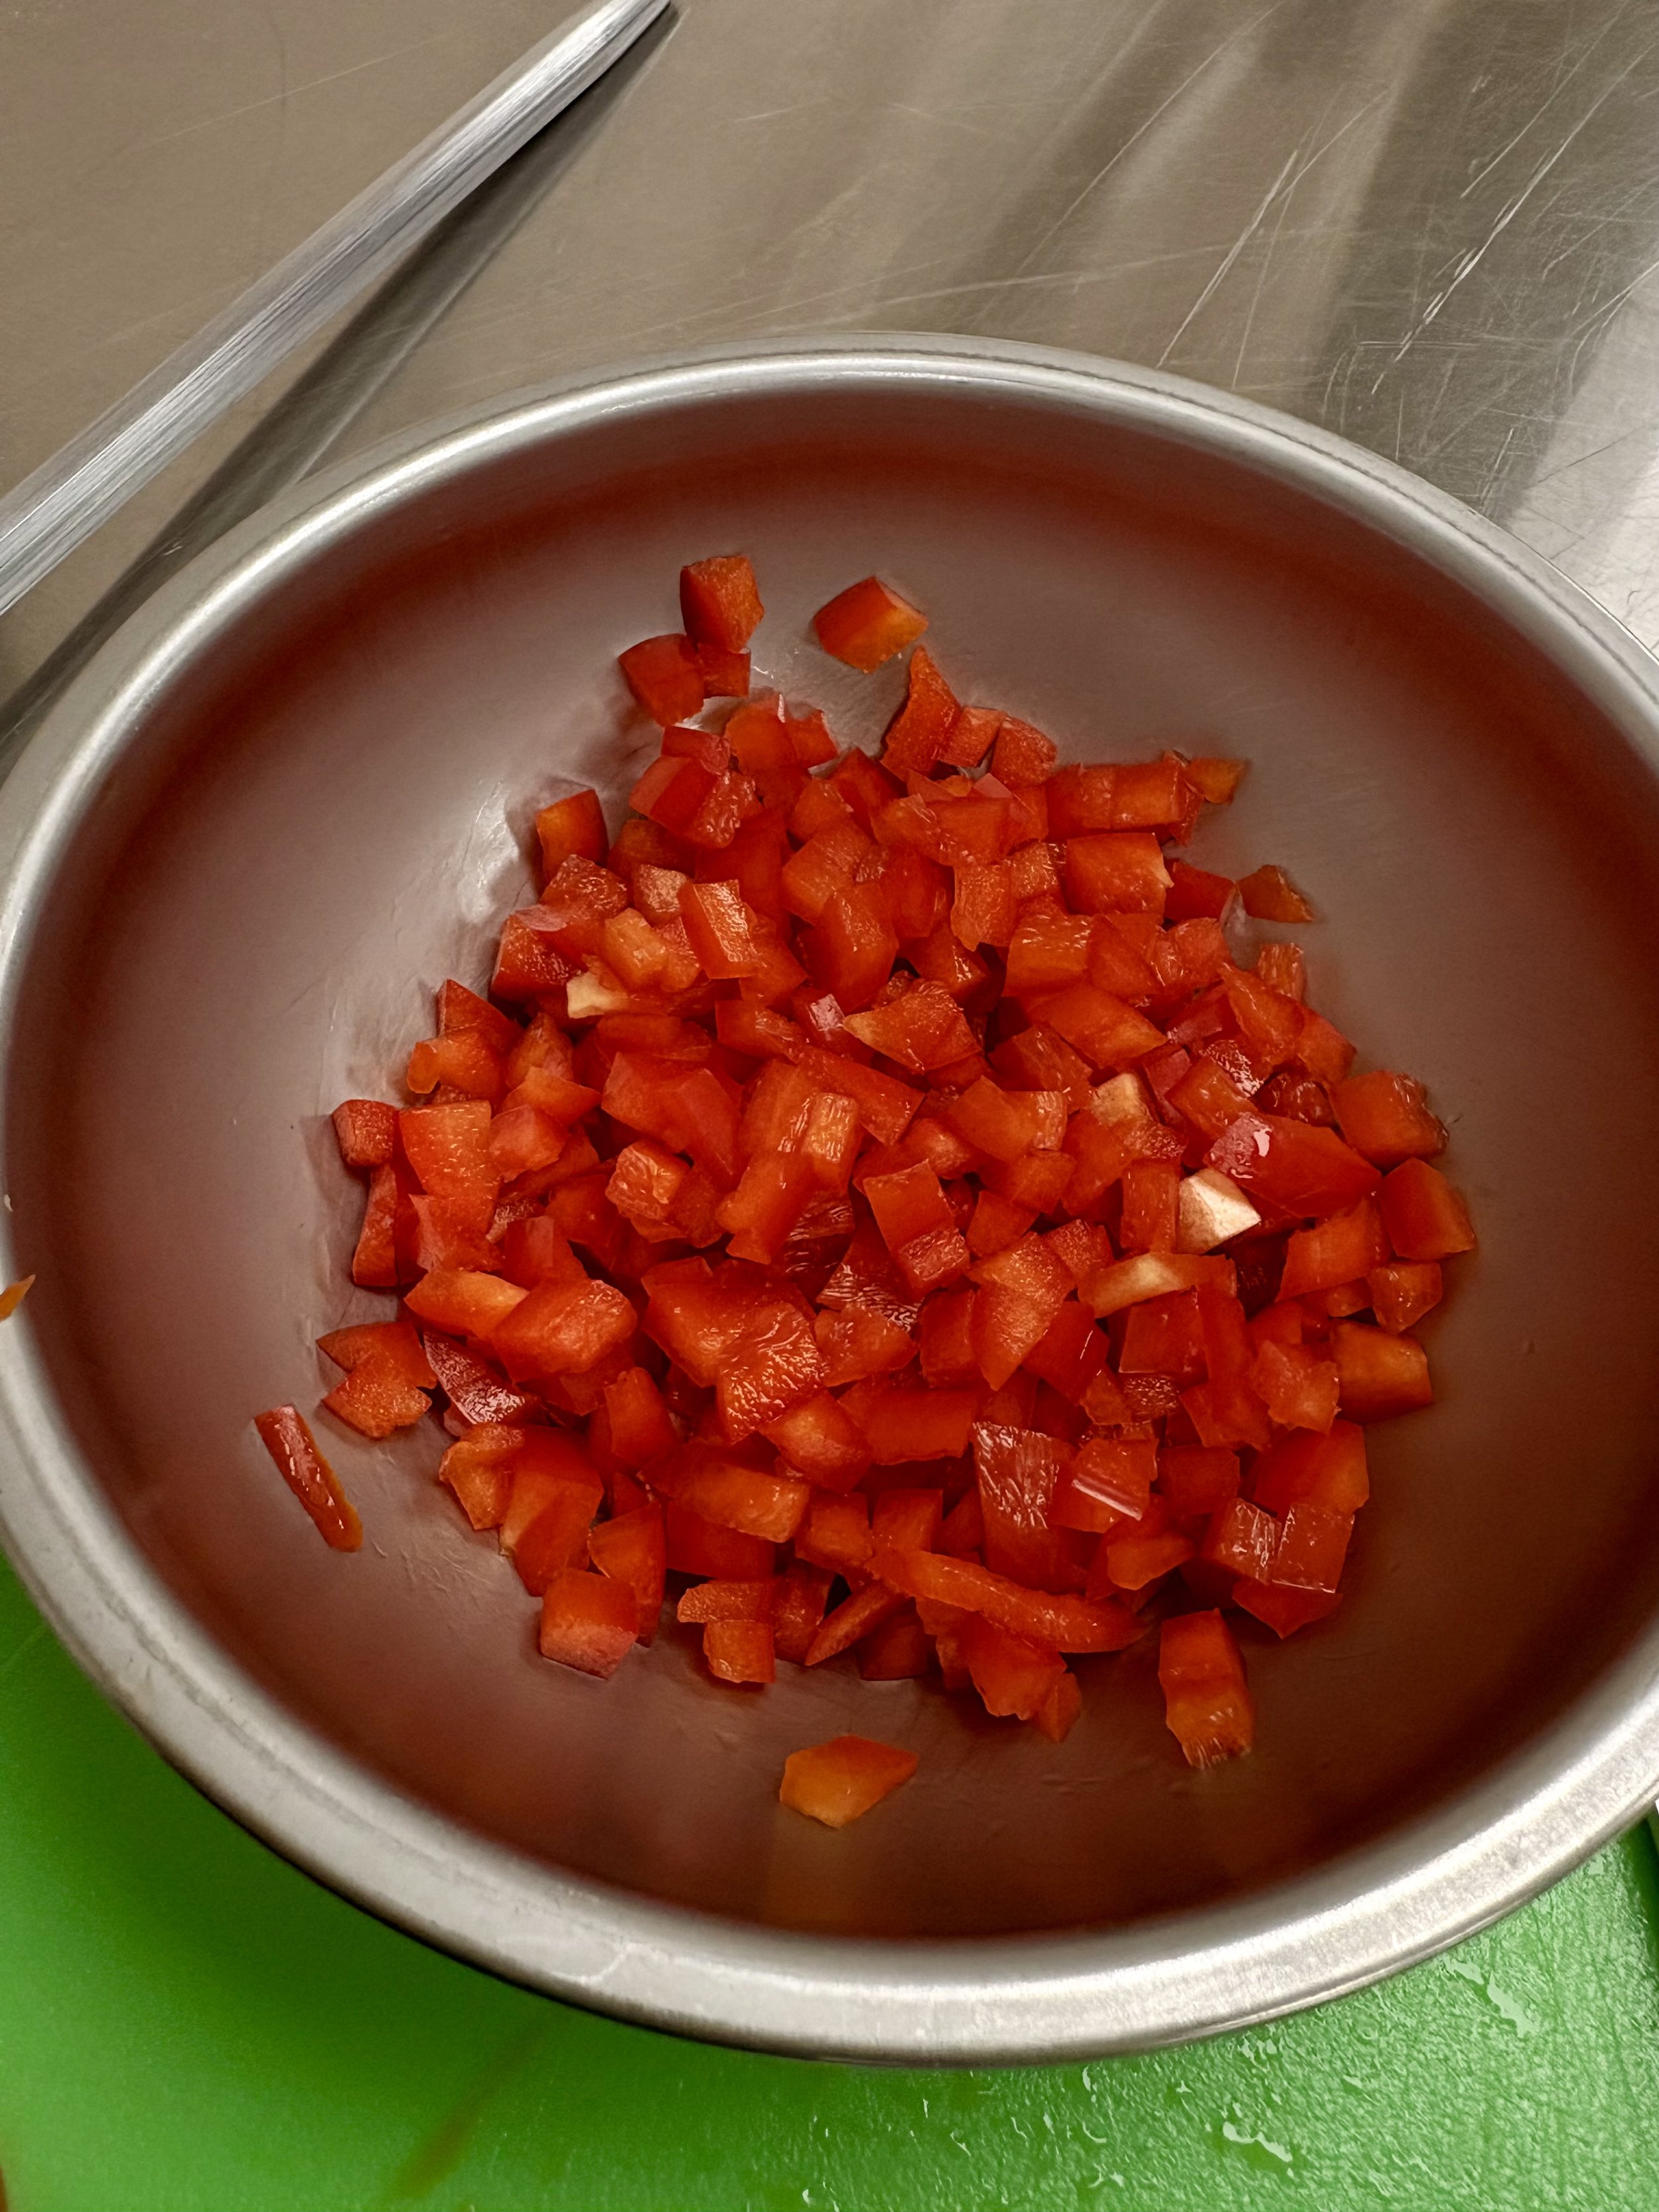
Step 5: Dice (if you want them smaller for soups etc…)

This is a demonstration of how to Julienne a pepper.
Lay your strips side by side and chop them into a nice even dice.
Troubleshooting & Common Mistakes
⚠️ Dull knife: increases your chance to cut yourself and makes it harder to create uniform strips of pepper
⚠️ Cutting too fast: makes it much harder to slice evenly and causes mistakes
⚠️ Ignoring the claw grip: can lead to cutting into your fingers
Final Result
Your peppers are now ready to serve in a salad, sauté to your liking etc. Do not be discouraged if you do not have perfect slices on your first try practice is key.
Storage
Not ready to use them yet? Try storing them in a freezer safe bag and keep them for an extended period of time ready to throw in a dish. They can also be stored in a airtight container in the fridge for up to seven days.
Enjoyed this blog? Share it with a friend to help my small blog grow, or check out some of my social media pages.
Like a amazon linked product you see? Use the link to help me earn a small proffit. I do not earn money from you reading this blog, but following my socials, or using my amazon links do help!